Manual Campaigns creation
To create a new manual campaign you must enter the menu item Manual Campaigns -> New Campaign.
The first stage invites us to indicate a series of campaign parameters, as indicated in Figure 1.
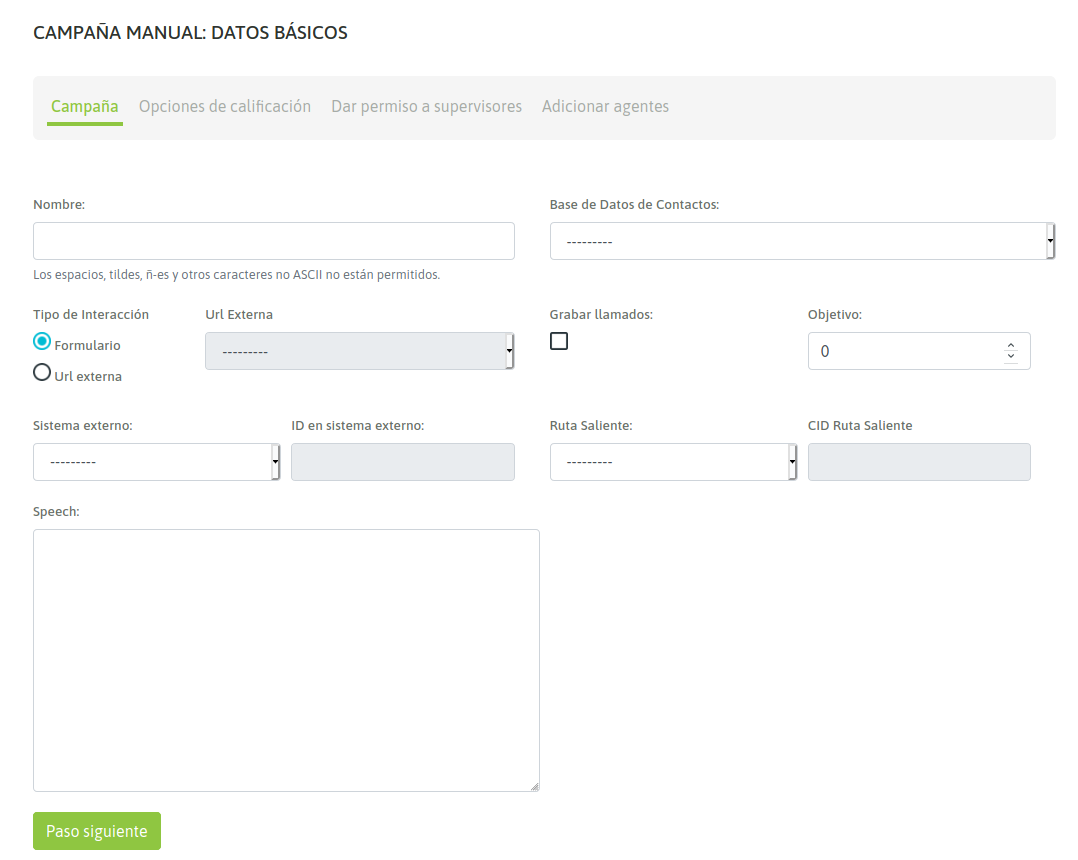
Figure 1: Campaign Parameters
- Name: Campaign name
- Contact database: it is used to display extra data to the phone number, when executing a call to a campaign contact.
- Type of interaction: configures wether the campaign will use OMniLeads’s forms or launch a request towards a CRM por every connected call.
- External URL: in case of selecting an external URL request launchfor each call, this parameter sets wich of the defined CRMs shall the campaign use.
- Enable recordings: enable the recording of all calls that are placed through the campaign.
- Scope: it is defined as the amount of engaged dispositions expected for the campaign. In the campaign monitoring, the percentage of the campaign’s arrival with respect to the defined objective is shown in real time.
- External system: Selects the external CRM that will execute the requests against OML (External System)
- ID on external system: the campaign ID in the external system from where the click to call or disposition request will be sent.
- Outbound Routes: An existing outbound route is assigned to an campaign.
- CID on Outbound Routes: This field must contain the CID assigned for an existing outbound route to a campaign.
- Speech: The campaign speech to be displayed on the agent console in the campaign calls”
Note
Regarding the contact base in manual (and also incoming) campaigns, it poses a flexible scenario, since it is optional to assign a contact database to this kind of campaign. In this case, the contact database is used if we want that each time an agent dials a telephone that corresponds to a contact in the database, the data (extra columns to the telephone) can be retrieved from it. In addition to working with a contact base in a manual campaign allows you to rate each contact called.
In the second screen you should assign the dispositions that are required so that agents can classify each call made. As can be seen in the following figure, in our example we handle 2 dispositions that trigger 2 different forms:
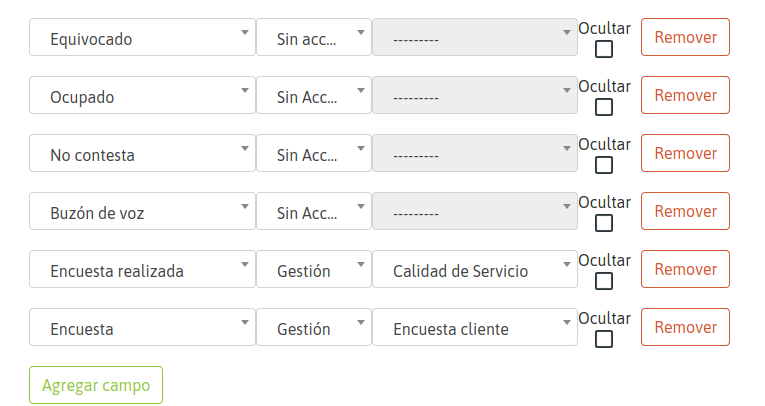
Figure 2: Campaign Dispositions
In the following steps you can add supervisors and agents to our campaign
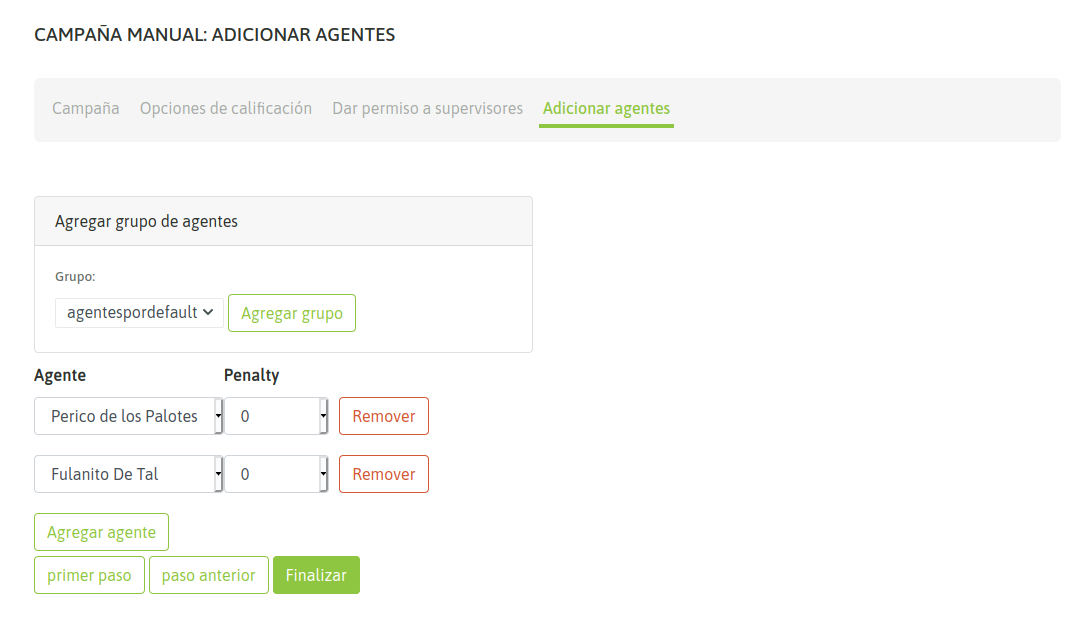
Figure 3: Agents Assignement
Agent-campaign interaction
Finally, we have our new manual campaign, so when an agent assigned to it makes a login to the platform and starts dialing calls from your webphone, the system will allow you to select the campaign on which you will assign each generated manual call from the webphone, as shown in figure 4.
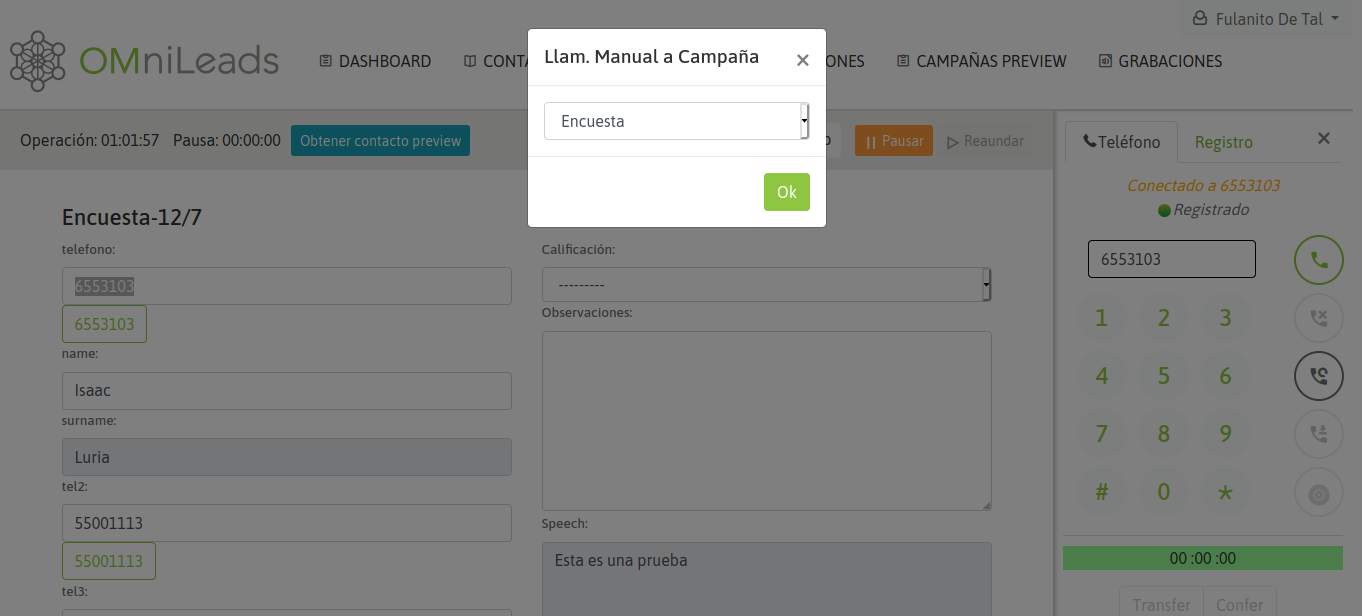
Figure 4: Manual Call to Campaign Selection
When an agent is online and dials a phone corresponding to a contact at the campaign database, the contact whose phone matches the phone dialed by the agent is displayed as a contact to select and thus display their data on the agent screen, it is also allowed to generate a new contact. Then the agent can either confirm that the call is triggered towards the listed contact or also create a new contact and dial it. The contact information (extra phone) is displayed on the agent screen.
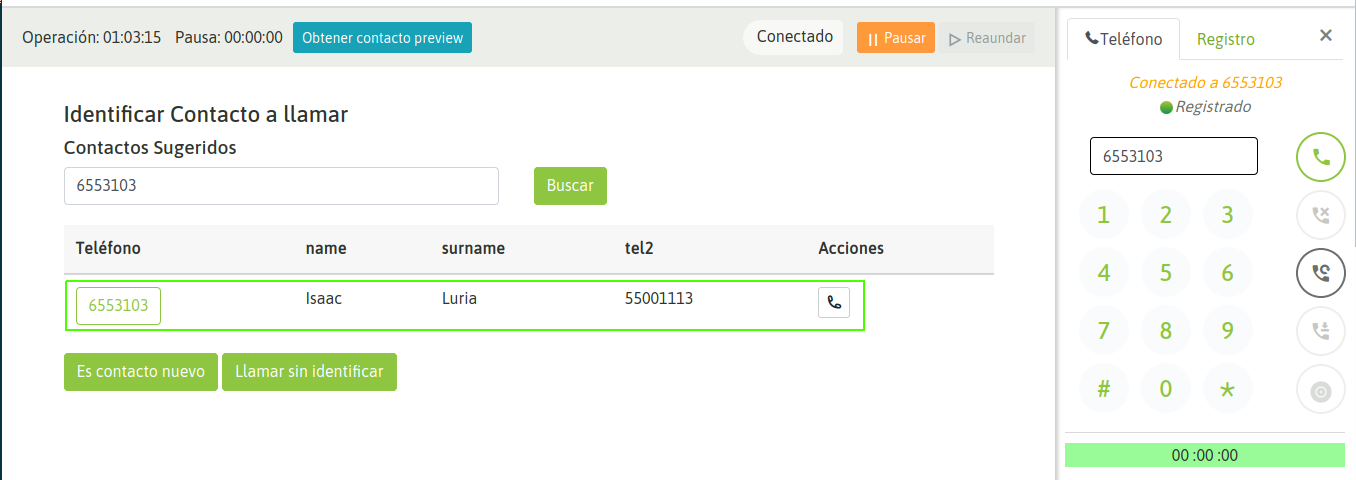
Figure 5: Contact Selection
If you select to call the contact listed, then the data is displayed on the screen, as shown in Figure 6.
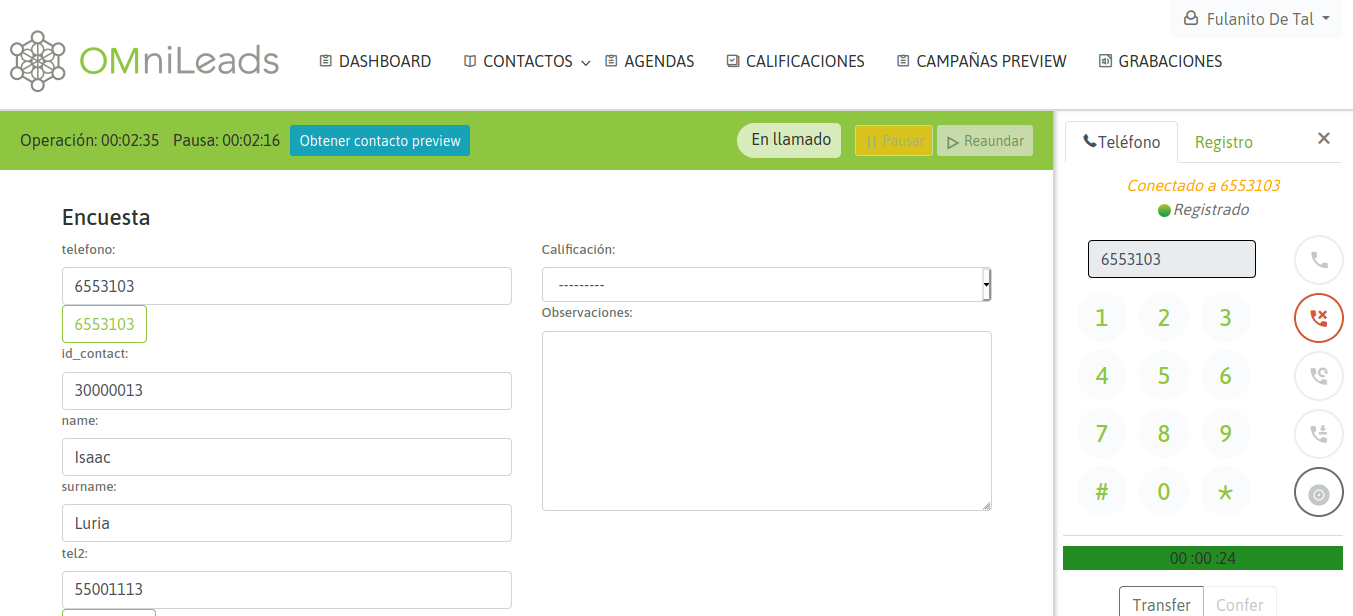
Figure 6: Contact Data
In this way the agent can assign a rating on the called contact; figure 7.
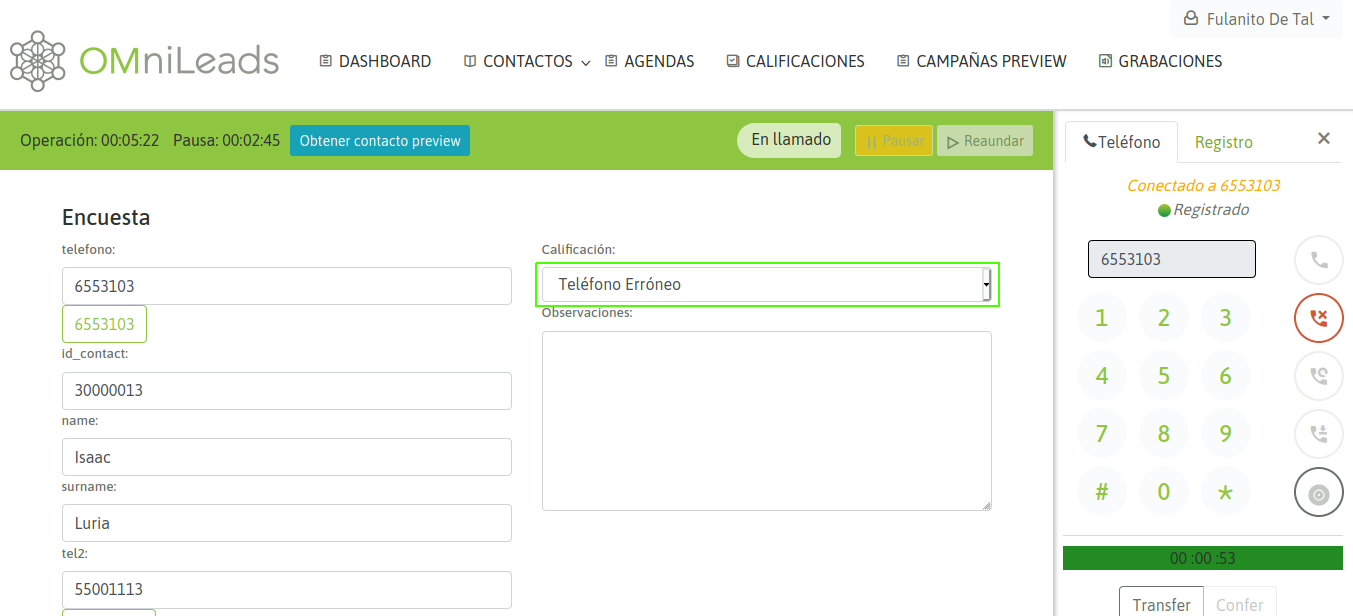
Figure 7: Contact Disposition
On the other hand, if the dialed telephone does not correspond to any contact of the database, then the system allows the agent to search for the contact in the database or generate a new contact. In the case of a campaign without a contact database, then each call made by an agent implies that the contact associated to the dialed call is generated (figures 5 and 6).
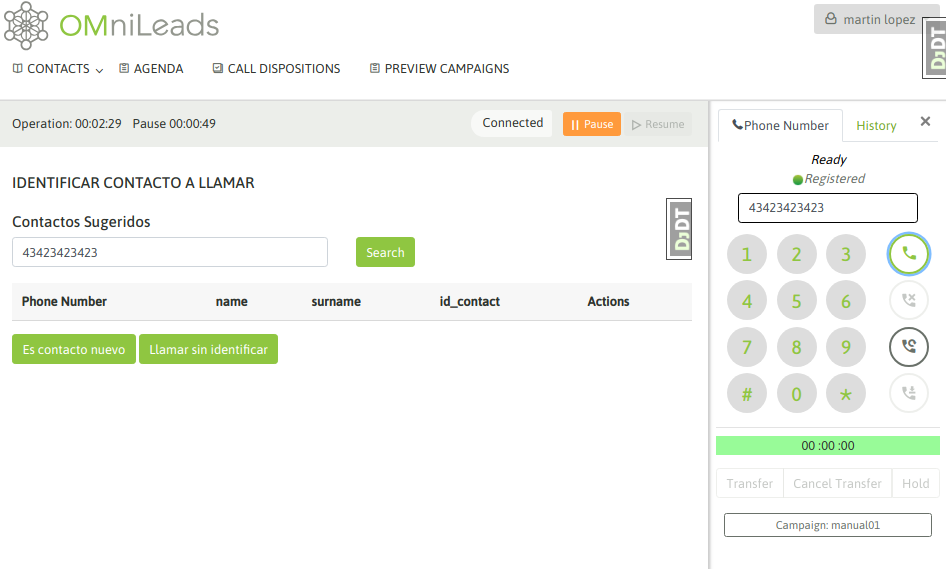
Figure 8: Add a new contact to database of campaign 1
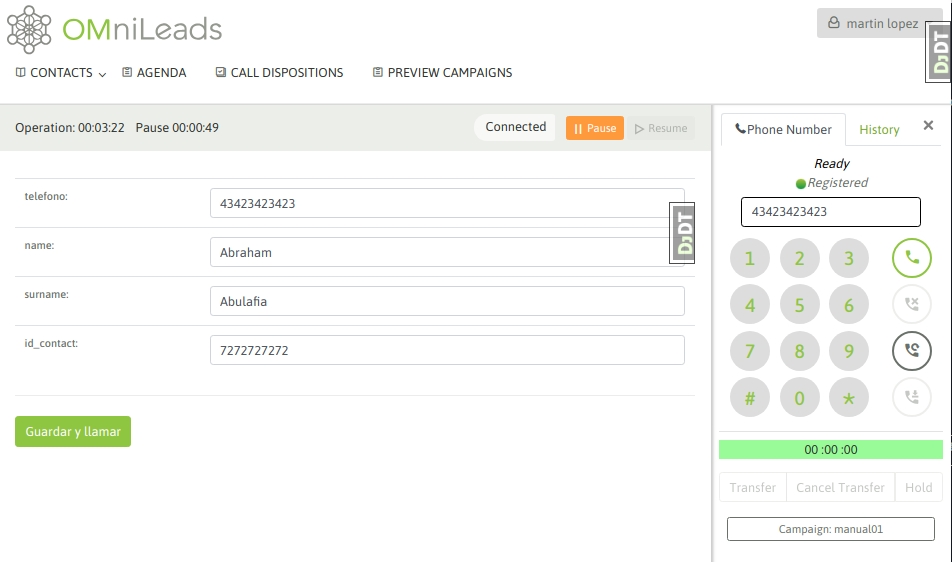
Figure 9: Add a new contact to database of campaign 2
Then at the time of dialing a number that does not return a contact, the agent will go through a view in which the agent must first add the contact as a record of the campaign base and then dial. Finally, the new contact and the option to classify the call with some qualification are displayed (figure 10).
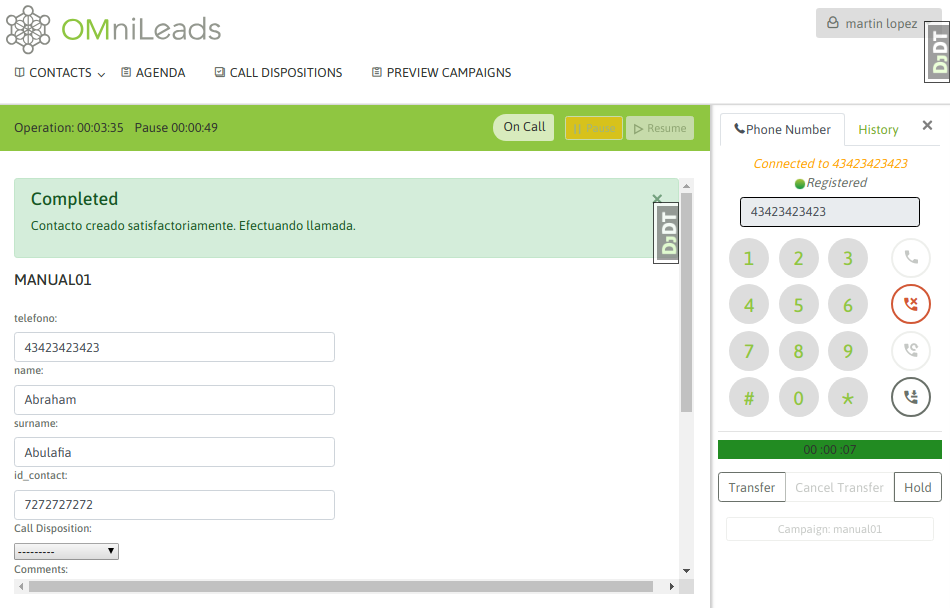
Figure 10: new contact called
Multinum contact database
As we know, OMniLeads admits that each contact of a database has n telephone numbers, so that if the contact is not found in its main number (the first of our database CSV file), it can be contacted at the other phone numbers. In this case, each telephone number (which we indicate in the database load) is generated as a link within the contact data presented on the agent screen. Clicking on that link triggers a call to the extra telephone number of the contact. Figure 11 shows this scenario.
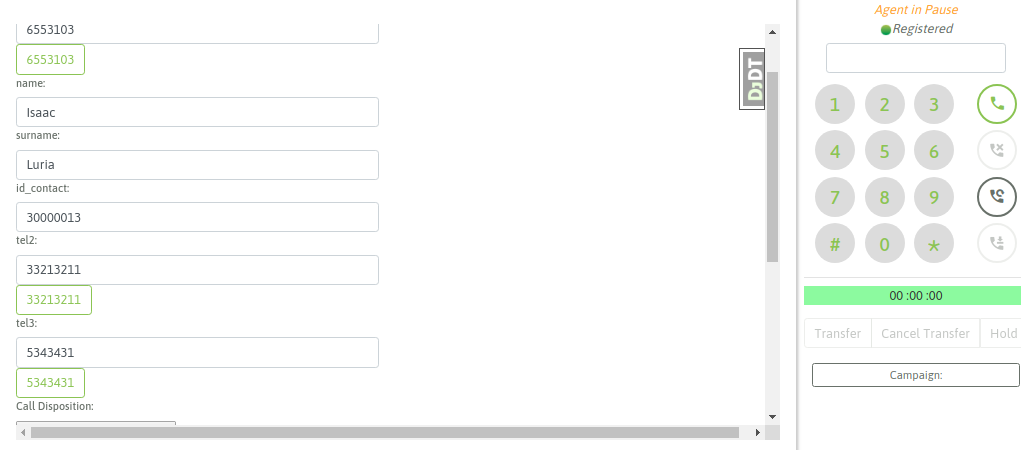
Multinum contact database
Therefore, the agent can try to contact all available numbers as a link in the contact form, until finally selecting a disposition and moving to a new one.