Preview campaigns creation
To create a new preview campaign you must enter the menu item Preview Campaigns -> New Campaign.
The first view invites us to indicate a series of campaign parameters, as indicated in Figure 1.
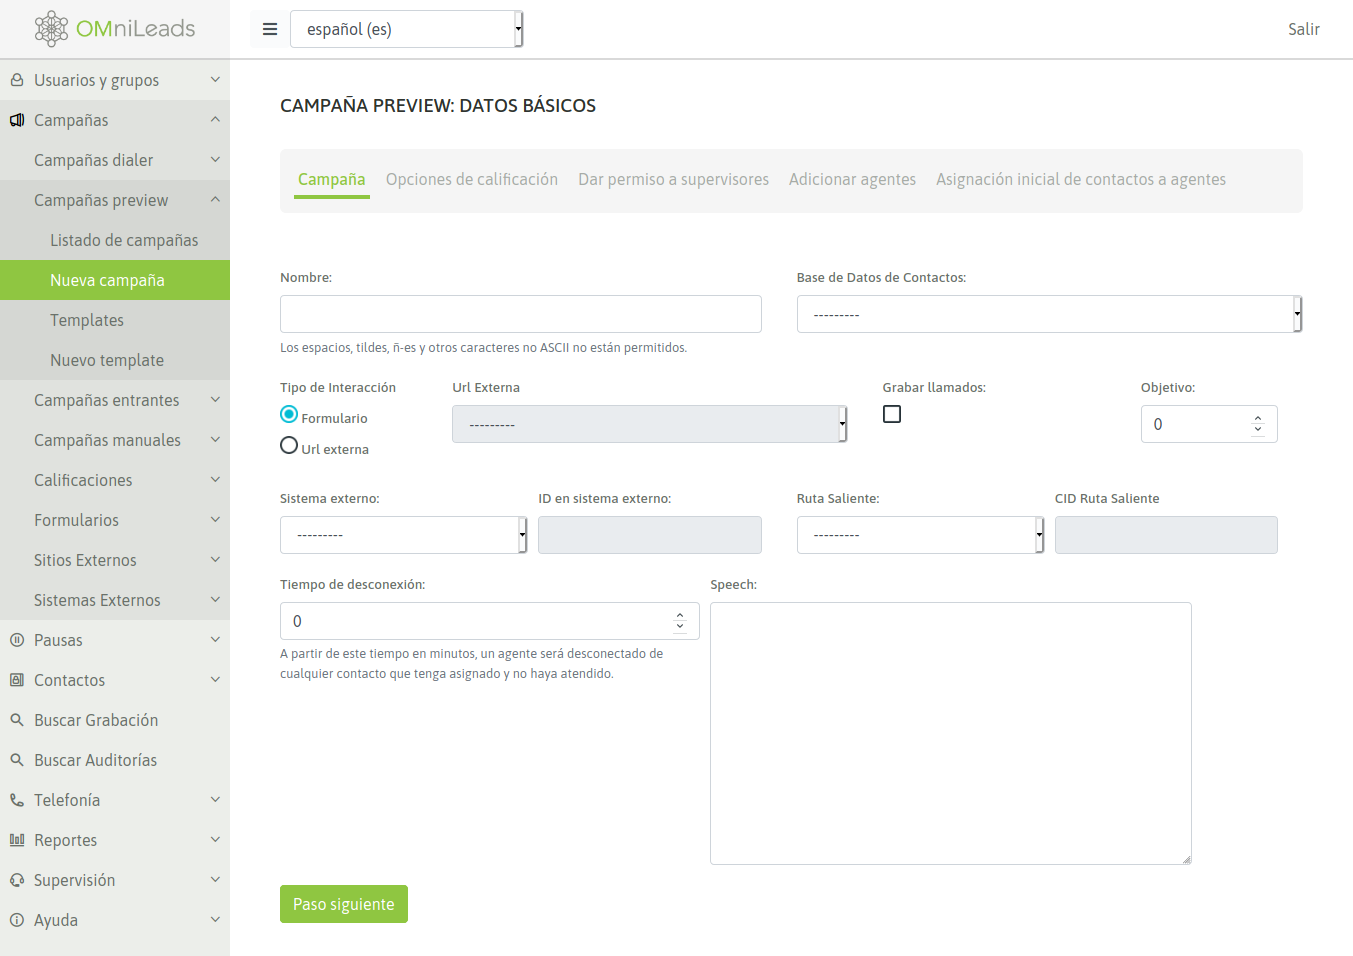
Figure 1: Campaign Parameters
- Name: campaign name
- Contact database: contact database that the preview dialer will use when delivering on demand contacts to each agent.
- Type of interaction: sets if the campaign will work with OMniLeads forms or make a request to the CRM for each connected call.
- External URL: in case of selecting an external URL interaction, this fields sets wich CRMs must the campaign trigger.
- Enable recordings: Enable all campaign calls to be recorded.
- Objective: It is defined as the number of positive steps expected in the campaign. In the campaign monitoring, it is displayed in real time the percentage of campaign progress with respect to this defined objective.
- External system: external CRM system linked to launch click to call actions or dispositions on campaign contacts, through the API.
- ID on external system: this field must containe the ID of the campaignin the external system from where the click to call or contact disposition requests will be triggered.
- Outbound Routes: An existing outbound route is assigned to an campaign.
- CID on Outbound Routes: This field must contain the CID assigned for an existing outbound route to a campaign.
- Disconection time: time that the preview dialer reserves a contact assigned to an agent, after that time the contact is released so that it can be sued by another agent.
- Speech: The campaign speech to be displayed on the agent console in the campaign calls.
On the second screen you must assign the dispositions that are required as available to the agents when classifying each call to each contact.
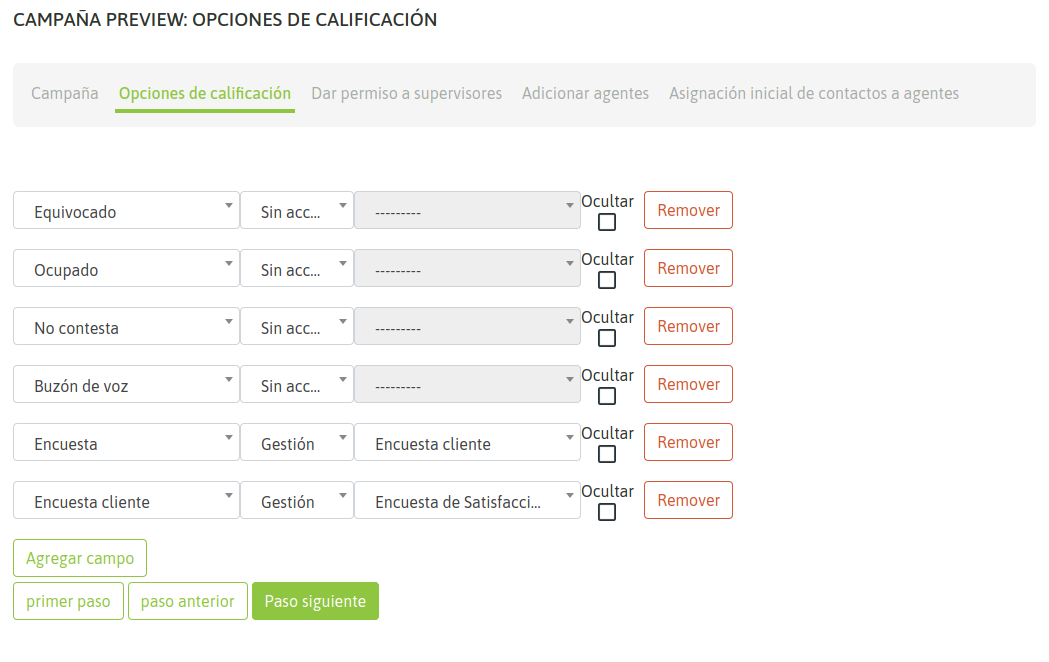
Figure 2: Dispositions Call
Then it remains to assign the supervisors and agents who can work on the campaign. An assignment of agents to a campaign is exemplified in Figures 3 and 4.
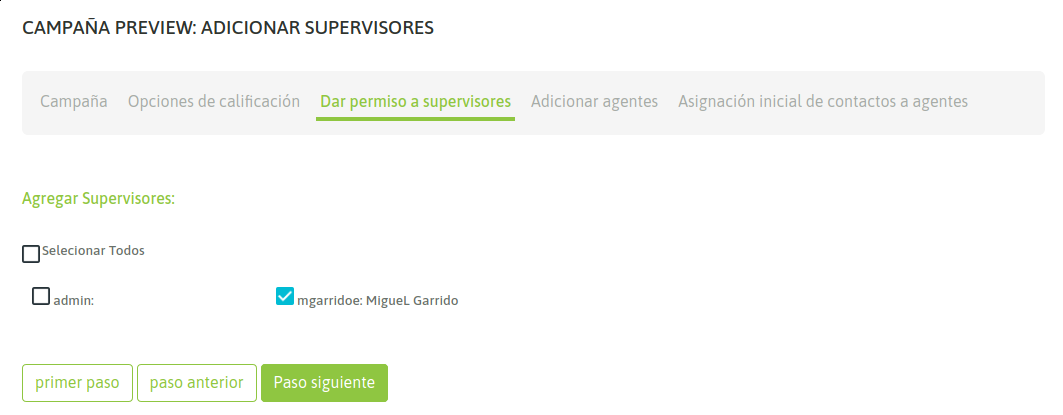
Figure 3: Supervisors Assignment
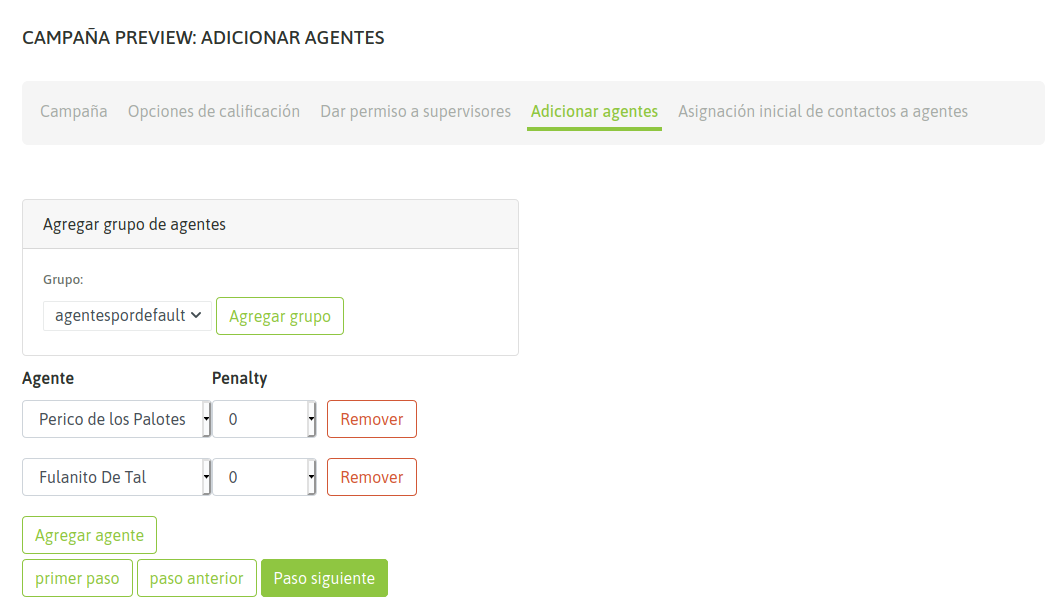
Figure 10: Deactivation contacts field
Finally, in the final wizard step is allowed, optionally realize a pre-assignation of contacs to agents. This operation can be made using two variants
The fist way is shown in the next figure:
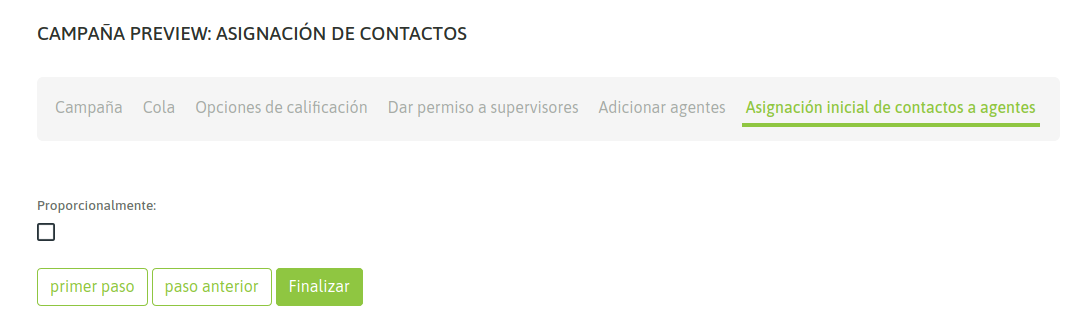
Figure 10: Deactivation contacts field
Contacts Assignment
If the option to allocate proportionally is selected, the system make an initial and equitable allocation of contacts to each of the agents. So when agent ask for a campaign contact, only free contacts will be given to or from the list of those assigned to it. We can see an example of distribution using the Django administrative interface in the following figure:

Figure 10: Deactivation contacts field
At the moment of select the proportionally pre-assignation the system shows the random selection
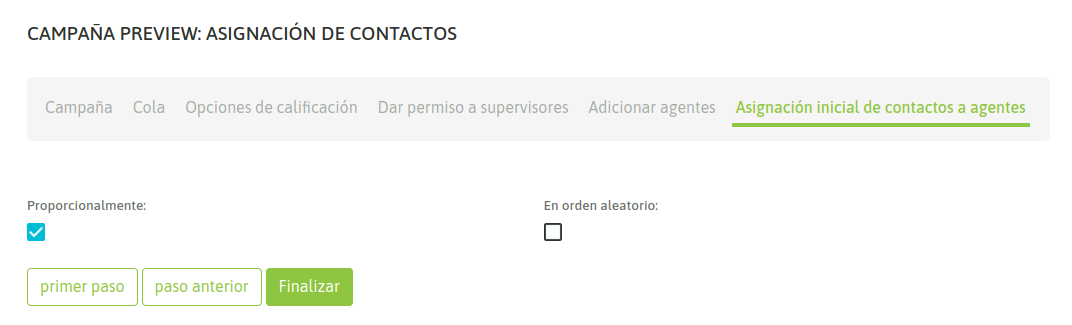
Figure 7: New option for random assignment
This option allows that the contacts could be assigned in random order to the agents, as is shown next:
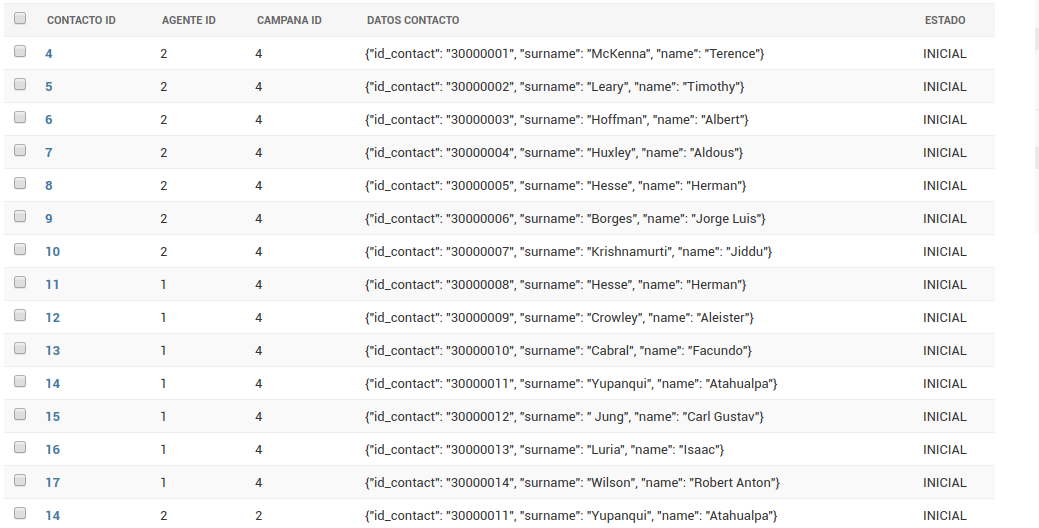
Figure 8: Proportional and Random Distribution of Contacts
Finally our campaign is available to start operating. Therefore, when the agents assigned to it perform a login to the platform, they should have the preview campaign as shown in Figure 5.
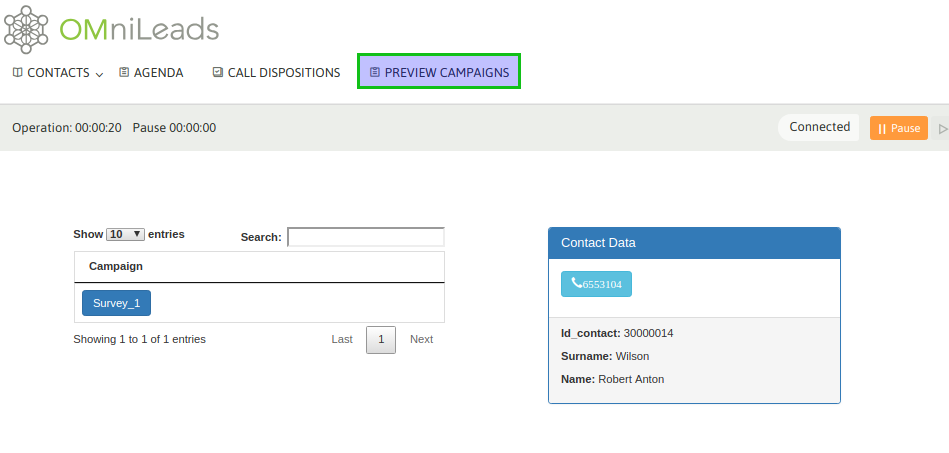
Figure 9: Preview Campaign Agent View
Agent-campaign interaction
If the agent clicks on the phone, then the call starts, and the data (extras to the phone) of the contact are displayed in the agent view, allowing the agent in turn to disposition the call with any of the call dispositions assigned to the campaign:
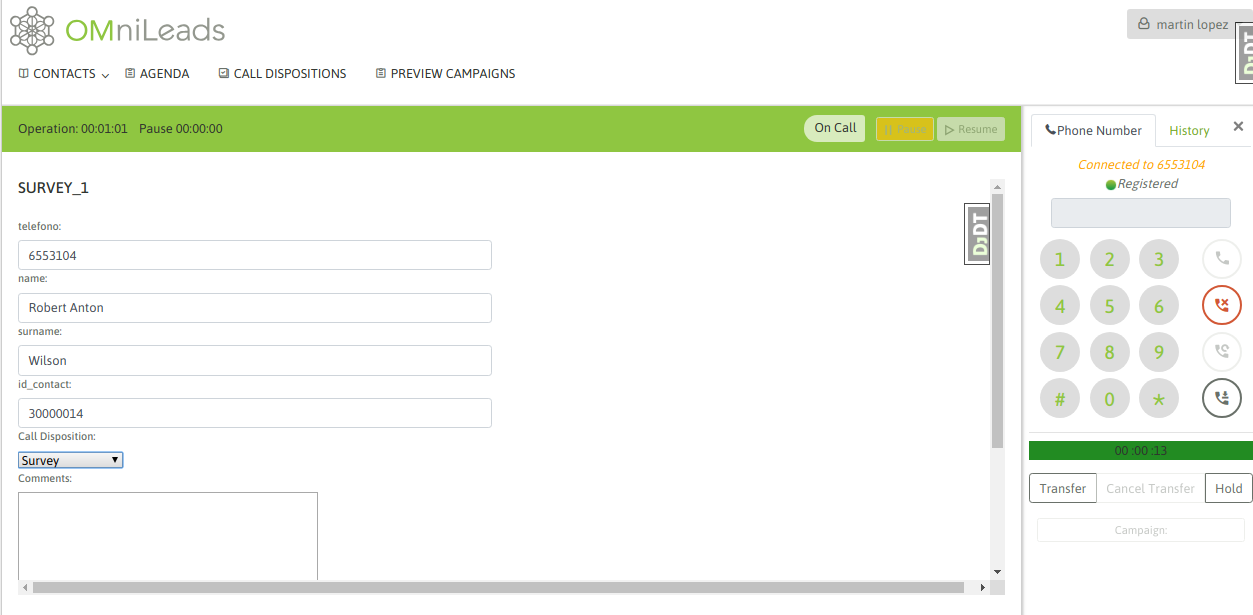
Figure 10: Deactivation contacts field
Campaign with Multinum database
As we know, OMniLeads admits that each contact of a database has n telephone numbers, so that if the contact is not found in its main number (the first of our database CSV file), it can be contacted at the other phone numbers. In this case, each telephone number (which we indicate in the database load) is generated as a link within the contact data presented on the agent screen. Clicking on that link triggers a call to the extra telephone number of the contact. Figure 11 shows this scenario.
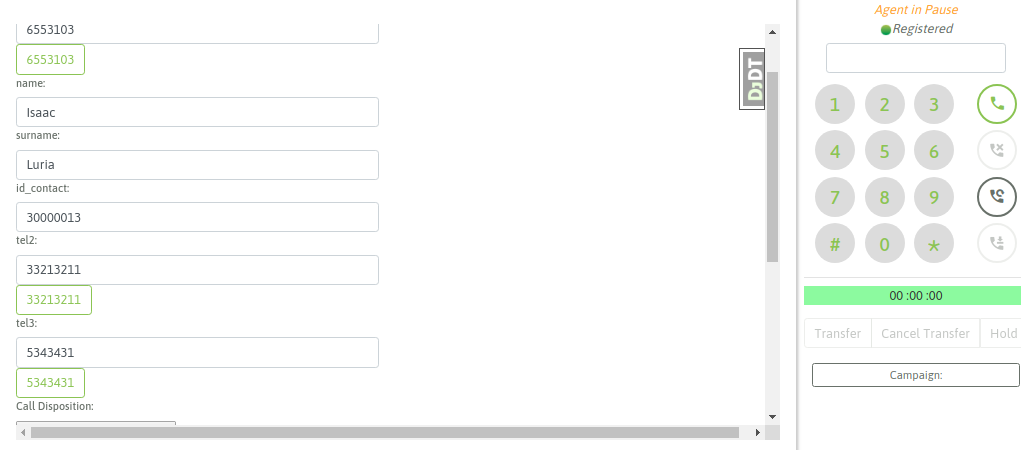
Campaign with Multinum database
Therefore, the agent can try to contact all available numbers as a link in the contact form, until finally selecting a disposition and moving to a new one.
Management of contacts assignments
Once the campaing is created the available contacts for every agent will be assign following an order established on the model AgenteEnContacto, this feature allows edit that order using the exportation/importation of .csv files
The idea is that the administrator can download the current order of contacts to a .csv file, reorder the rows and then import the file, in which the new order impacts on the order of the assigned contacts to agents in the campaign.
This feature is accessible using the preview campaign menu
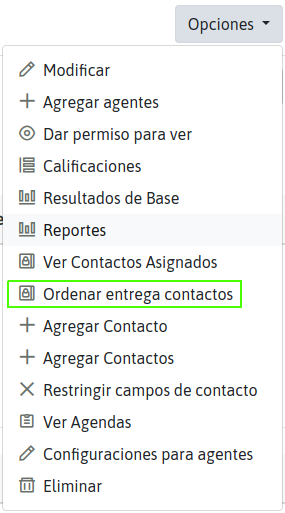
Figure 8: Access to reorder contacts assignments page
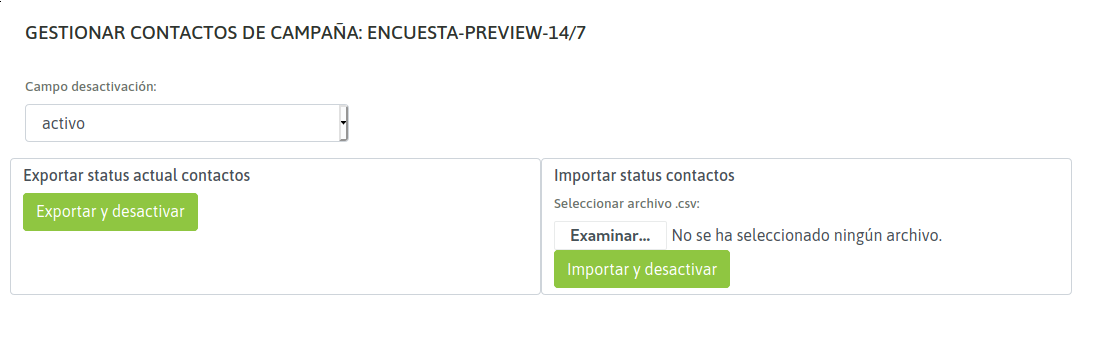
Figure 9: Reorder contacts assignments page
Also, is possible to tag contacts as disabled, which will not delivered to any agent
This is posible by defining a deactivation field for the campaign choosing between the data colums in contacts database

Figure 10: Deactivation contacts field
Important
The field to choose should be taken into consideration in the CSV format before importing the contact database and attaching it to the campaign. It is not allowed to add or modify the names of the columns in the CSV afterwards.
After make current contacts order exportation is possible to edit the deactivation field column with values 0 or FALSE wich, after importation of.csv file will indicates to the system to not deliver this contacts to any agent.Any other value different to 0 or FALSE makes the system can deliver the contact.