RTPEngine Deployment
Como es sabido, RTPEngine implementa un script de fisrt_boot_installer.tpl, que puede ser invocado utilizando tecnología de provisioning, o bien ser descargado y luego ejecutado sobre el Linux host en cuestión.
Para obtener nuestro script, se debe lanzar el siguiente comando:
curl https://gitlab.com/omnileads/omlrtpengine/-/raw/master/deploy/first_boot_installer.tpl?inline=false > first_boot_installer.sh && chmod +x first_boot_installer.sh
So, once we have the script, we go to work on the variables, removing comments and setting their values inside the script. We are going to list and explain each of these variables that should be set before running the script.
Installation Variables
- oml_infras_stage: Se refiere al proveedor de infraestructura implicado. La idea es aprovechar las APIs de los proveedores cloud para determinar cuestiones como parámetros de la red. Si vamos a instalar OnPremise o en alguna nube que no está dentro del listado, asignar onpremise como valor para la variable. Posibles valores: onpremise, aws, digitalocean, vultr, linode.
- oml_nic: Aquí debemos indicar la interfaz de red sobre la que se levantará el puerto TCP 22222, que va a procesar las solicitudes provenientes desde Kamailio para establecer un SDP en la sesión WebRTC.
- oml_public_nic: Éste parámetro es opcional, y tiene que ver con el escenario en el cual se cuenta con 2 placas de red, una para LAN y otra WAN.
- oml_rtpengine_release: Aquí debemos indicar qué versión del componente se desea desplegar. Para ello, se deberá revisar el archivo .gitmodules de la versión de OMniLeads que se desee desplegar, y tomar el parámetro branch del componente, como valor de ésta variable.
- oml_type_deploy: Aquí indicamos bajo qué escenario estará operando nuestro RTPEngine. Para entender ésta variable, debemos repasar el funcionamiento de éste componente, ya que RTPEngine es quien concede los parámetros necesarios (dirección de red y puerto, entre otros) para acordar el streaming de audio con el usuario (agente o supervisor). Dependiendo del escenario dispuesto, los posibles valores son: LAN, CLOUD, HYBRID_1_NIC, HYBRID_2_NIC.
- LAN: Los agentes acceden a OMniLeads SÓLAMENTE desde una red LAN.
- CLOUD: Los agentes acceden a OMniLeads SÓLAMENTE desde Internet.
- HYBRID_1_NIC: Agents access both from a LAN and from INTERNET, while the Linux instance hosting the component has a single NIC.
- HYBRID_2_NIC: Agents access both from a LAN and from INTERNET, while the Linux instance that hosts the component has 2 NICs (one for LAN and one for WAN).
Installation Execution
Finally, we can launch our script first-boot-instaler.sh. That can be done as user_data of a cloud instance, through some command line utility to manage the infrastructure, or directly copying the file to the destination Linux host and launching the execution from it.
Una vez ejecutado el script y finalizado el deploy, debemos comprobar que el componente se encuentra operativo, lanzando el siguiente comando:
systemctl status rtpengine
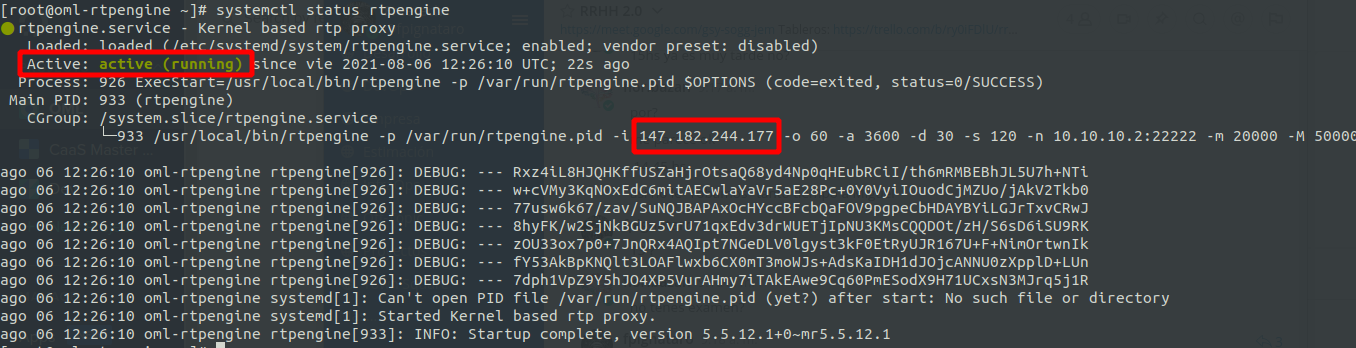
As highlighted in the figure, it is important to check that the IP address match your scenario. That is to say, if we are in a environment of users who access from LAN, we will have to use a private IPv4, and if users access from the Internet, we will use a public IPv4.