Terraform AWS
La instalación de OMniLeads para AWS nos permite gestionar un negocio de Contact Center as a Service. Es decir que podemos administrar múltiples instancias de OMniLeads asociadas a diferentes suscriotores/operaciones de Contact Center. A su vez se cuenta con la facilidad para redimensionar cualquier componente del despliegue ya sea a la hora de escalar o contraer la cantidad de usuarios demandados por cada cliente del SaaS, así como también administrar la aprovisión de actualizaciones desde el enfoque de la Infraestructura inmutable.
The code that implements our deployer is in Gitlab. Therefore, the first thing what we should do is to bring us the repository:
git clone --recurse-submodules https://gitlab.com/omnileads/terraform-aws.git
Pre-requisites
It is essential to have each of the items listed below:
An Amazon Web Services Account
A user with programmatic access (access_key & secret key)
An SSH RSA pub key available to associate with AWS
Acquire a public domain through, for example: AWS-Route53
The domain is used by Terraform when generating each URL of client and its SSL certificate, in such a way that when invoking that URL resolves the request against the OMniLeads instance corresponding to that tenant.
Generate a new directory called *instances* at the root of the repository
Ideally it should be from cloning a repository on which we will work at the GIT level each managed tenant. (We will return later to this matter).
cd terraform-aws
git clone https://your_tenants_repo instances
Note
The directory SHOULD be named exactly instances
Deployer Configuration
To start working with our SaaS customers we should count on with Terraform and aws-cli installed. These utilities can run on MAC, Windows or Linux, however our repository contains a script to run a Docker container with everything installed and ready to use.
To launch the container deployer we should first generate the file .env with a series of variables:
cp .env_template .env
Once our file is generated, we should assign values to the following variables:
# Container variables
AWS_ACCESS_KEY_ID=
AWS_SECRET_ACCESS_KEY=

# Variables for terrafom
TF_VAR_domain_name=your_public_domain
TF_VAR_aws_region=your_aws_region
TF_VAR_pstn_trunks=["X.X.X.X/32"]
TF_VAR_shared_env=shared-common-infra-name
TF_VAR_s3_access_key=
TF_VAR_s3_secret_key=
TF_VAR_aws_ssh_key=
Once all the variables have been adjusted, we launch the container deployer:
Este comando nos devolverá un promp dentro del container, además se accede desde allí a toda la estructura del repositorio:

From our container we are going to carry out all the necessary actions on each tenant managed as well as on the networking infrastructure, storage and components common to each tenant.
Note
We will come back to the TF_VAR_shared_env variable later.
Terraform Code Organization
Before moving forward with the management of common infrastructure and tenants,Let’s clarify the structure of the Terraform code.
Shared Infrastructure
On the one hand it contains the code that deploys the infrastructure shared (from now on: shared) by all instances of OMniLeads of each client (from now on: tenant), that is:
- Networking: VPC, IGW, NAT-GW, public and private sub-net, security groups, etc.
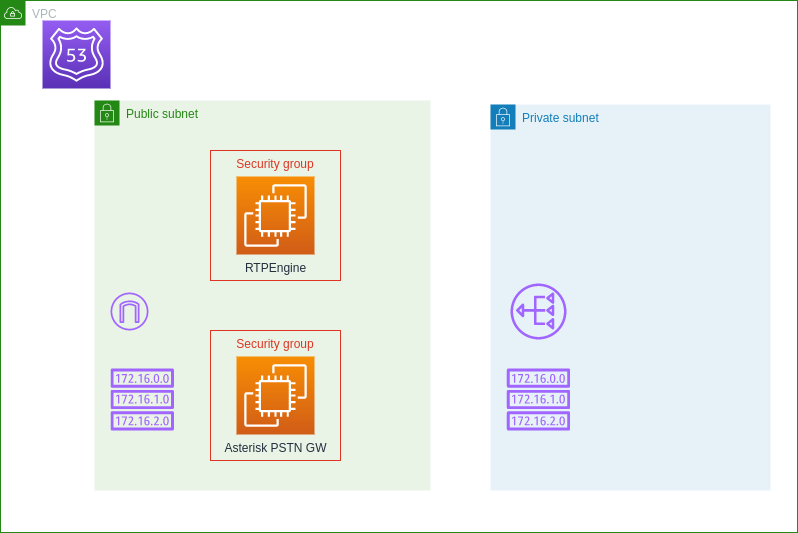
- OMniLeads Shared Components: RTPengine and Asterisk PSTN-Gateway with fixed public ip.
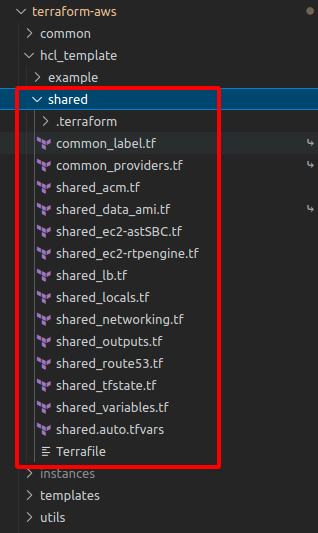
The Terraform matrix code that implements the shared infrastructure can be inspected inside the hcl_template/shared folder
Tenant Infrastructure
On the other hand we have the code that materializes each instance of the App intended for each tenant subscribed to our SaaS:
- EC2 instances for each App component (Redis, Django, Asterisk,Kamailio and optionally Wombat Dialer)
- RDS PostgreSQL Instance
- AWS-S3 Bucket for call recording and logs storage
- Load Balancers

Important
Keep in mind that there are two components that are managed using auto-scalling groups from AWS, these are OMLapp and Wombat Dialer. Whereas kamailio, asterisk and redis are just instances from ordinary EC2s.
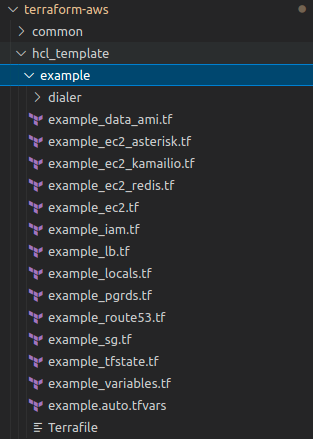
The Terraform matrix code that implements the tenant infrastructure can be inspected inside the hcl_template/shared folder
Note
By default, an Asterisk pure instance is deployed within the shared infrastructure, so that it can be optionally used as an edge gateway with a fixed public IP, since the immutable infrastructure approach applied to deployments of the tenant components implies that the IP of the Asterisk component changes every time there is an update. Many SIP providers require fixed public IP addresses to grant a trunk, that’s the reason why a shared Asterisk component is needed.
Shared Infrastructure management
The shared infrastructure is deployed in a specific AWS Region (ex: us-east-1) only once instead of starting our CCenter as a Service business, as it was introduced as the common components used later by each of the instances of OMniLeads destined to each new Tenant.
Note
Debemos gestionar un despliegue shared por cada región del mundo en donde luego querramos desplegar tenants.
Here are the necessary steps to carry out the deployment of the shared infrastructure.
- Launch a container
In the repository root, launch the script run_terraform.sh
./run_terraform.sh
- Initialize shared environment
En este punto se debe considerar un condicionamiento respecto al nombre permitido para asignarle a la vairbale ENV que se utiliza como argumento a la hora de indicar una inicialización de un nuevo entorno. El nombre debe empezar con la cadena shared, por ejemplo sharedinfras:
make init ENV=shared-infras
Important
La cadena asignada como parámetro ENV debe comenzar con la palabra shared y NO se permiten caracteres especiales NI TAMPOCO “- ó _”
After finishing the execution of the command, a new folder is available under the directory instances called with the assigned name as a parameter ENV. Under that folder we will find the code terraform which deploys the shared infrastructure.
- Variables to Adjust
Inside the new folder we will have a variable file that we should review and adjust. Among the shared components there are RTPengine and Asterisk-PSTNGW which are EC2 instances within the public subnet, the variables disk_size and ec2_size correspond to the EBS disk size and instance size.
# AstSBC  variables
disk_size_astsbc        = 50
ec2_size_astsbc         = "t3.small"

# RTPengine  variables
disk_size_rtpengine     = 40
ec2_size_rtpengine      = "t3.small"
- Shoot the deployment of infrastructure
Now we can fire a plan and later an apply to deploy our infrastructure.
make apply ENV=shared-infras
Once the procedure is finished, we should observe an exit similar to:
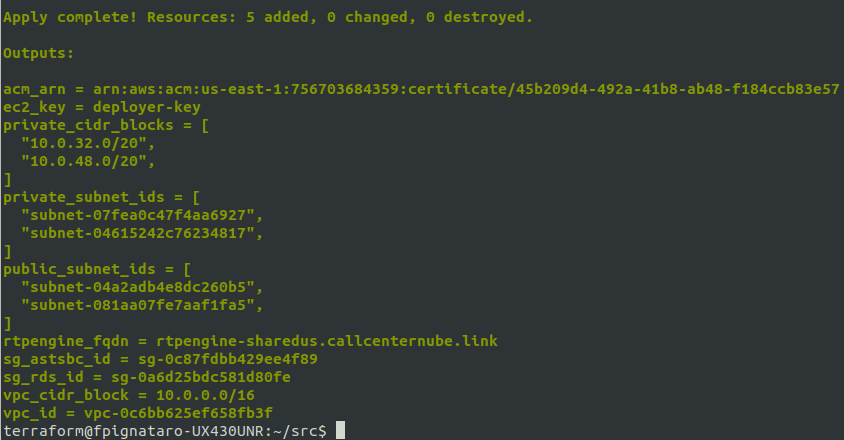
You will be able to check all the infrastructure generated through your AWS web interface.
Tenants Management: deploy
Once the shared infrastructure is deployed, we can start to manage tenants under subscription. For this we should initialize, adjust variables, plan and finally deploy the instances of OMniLeads assigned as new Tenant.
Note
It is essential to make sure that the environment variable TF_VAR_shared_env of the container deployer has the correct value according to the name used in the deployment of the infrastructure shared, on which you want to deploy the new Tenant
Initialize a tenant:
To prepare a new tenant you should run the command:
make init ENV=nombre_de_cliente DIALER=yes|no
As can be seen when the initialization command is launched, the required arguments are:
- ENV: this parameter implies the reference name that we are going touse to name our OML instance. It is the name that the resources will take like VM, loadbalancer, postgres cluster, etc.
- DIALER: with this parameter we indicate if the display includes the Wombat dialer component and its MySQL backend, if not neccessary then we can avoid the resources corresponding to functionality.
The make init command is responsible for generating the directory where the Terraform code will reisde with this new tenant, within instances. That is to say, after the execution we will have in directory instances a new directory with the name we have used for the ENV parameter.
Important
The name assigned to the ENV parameter must NOT contain the character “-“.
Adjust Deployment Variables
At this point we have to define the sizes of the EC2 instances that will host the different components, as well as the pgsql cluster RDS. For them we move on to the new directory generated with the make init and there we edit the file tenant.auto.tfvars.
## SIZING VARS ## SIZING VARS ## SIZING VARS
# OMLapp component ec2 size
ec2_oml_size            = "t2.medium"
customer_root_disk_type = "standard"
customer_root_disk_size = 20
ebs_volume_size         = 10
# Asterisk component ec2 size
ec2_asterisk_size       = "t2.micro"
asterisk_root_disk_size = 50
# REDIS component ec2 size
ec2_redis_size          = "t2.micro"
# Kamailio component ec2 size
ec2_kamailio_size       = "t2.micro"
kamailio_root_disk_size = 25
# Websockets component ec2 size
ec2_websockets_size       = "t2.micro"
websockets_root_disk_size = 25
# RDS PGSQL cluster size
pg_rds_size             = "db.t3.micro"
We must also adjust the OMLApp Component Installation Variables, we do not list all of them since some of them are supplied by Terraform like _host variables.
# Braches release to deploy
oml_app_branch          = "release-1.24.0"
oml_redis_branch        = "210714.01"
oml_kamailio_branch     = "210714.01"
oml_acd_branch          = "210802.01"
oml_websockets_branch   = "210802.01"

# Customer variables
ami_user                = "omnileadsami"
ami_password            = "5_MeO_DMT"
pg_database             = "chanaes_oml"
pg_username             = "chanaes_pg"
pg_password             = "admin123"
ECCTL                   = "28800"
SCA                     = "3600"
TZ                      = "America/Argentina/Cordoba"

# Wombat Dialer variables used if DIALER=yes if DIALER=no these variables doesn't care
mysql_rds_size          = "db.t3.micro"
ec2_dialer_size         = "t2.micro"
dialer_user             = "demoadmin"
dialer_password         = "demo"
mysql_database          = "wombat"
mysql_password          = "admin123"
wombat_version          = "20.02.1-271"
Check Integrity:
The make plan command helps us to check the integrity of our deploy:
make plan ENV=nombre_de_cliente
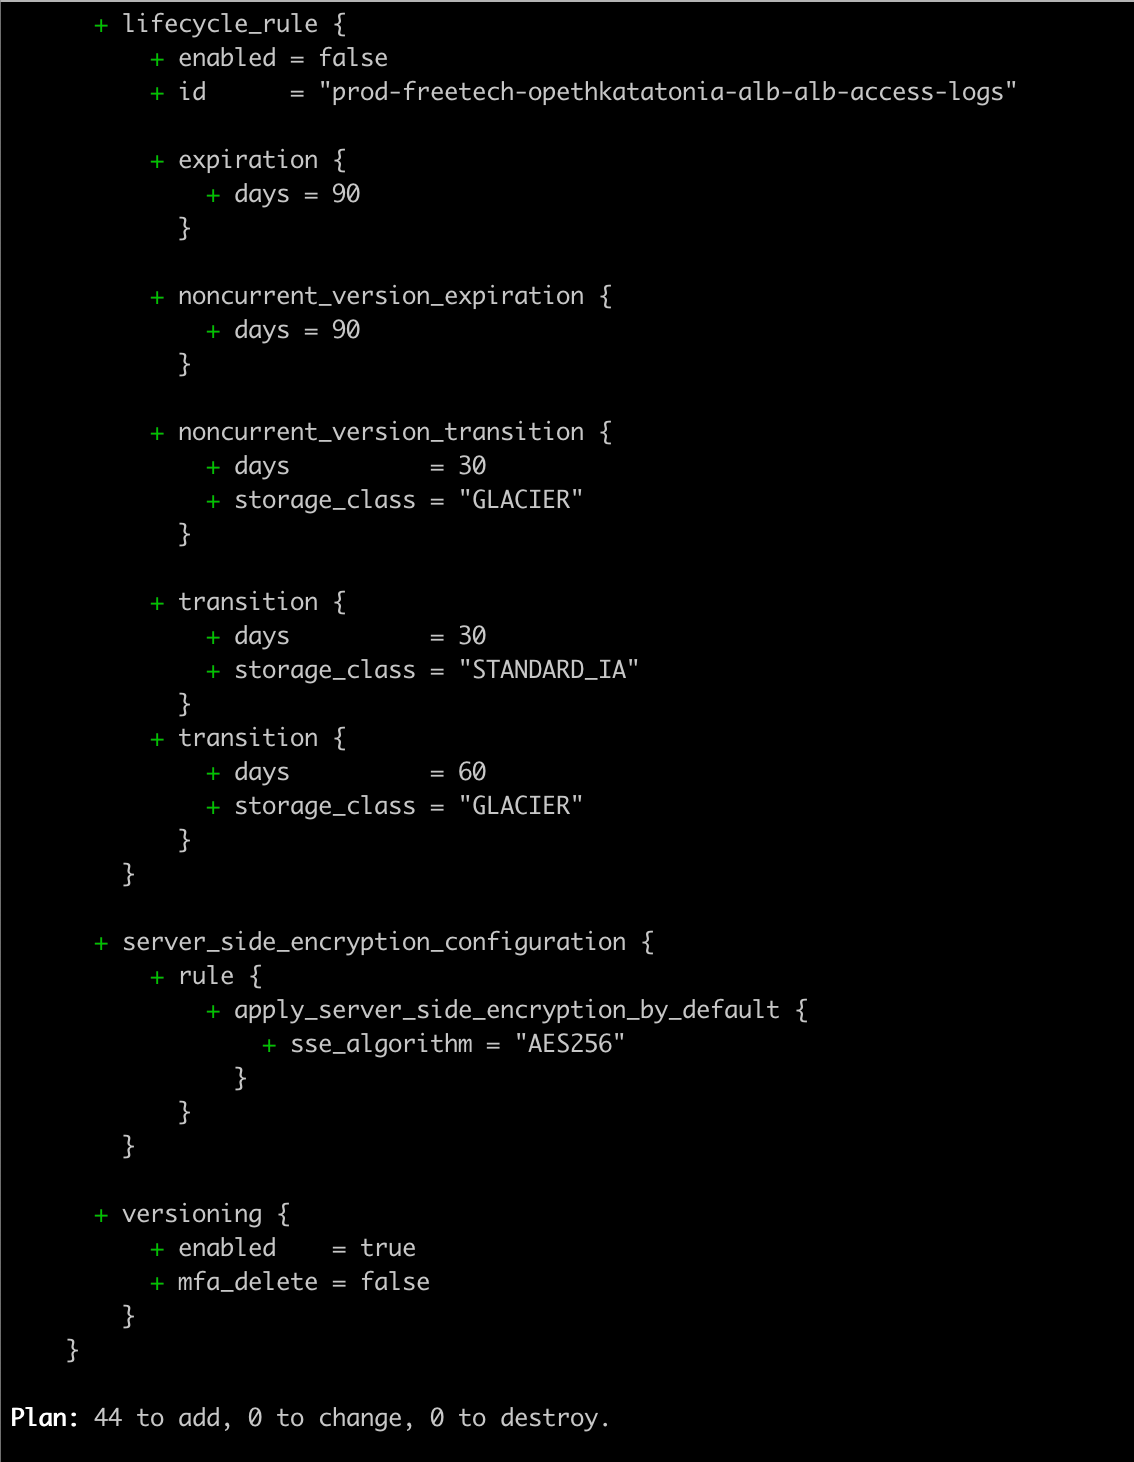
If the plan finnishes without errors, then we are ready to run an apply!
Apply Deployment:
The command make apply triggers the execution of instance/tenant deployment. It can take 5-10 minutes to finish the creation of all infrastructure resources to then launch the Installation of each component, taking about 30 minutes to start operating with our URL: https: //tenant_name.your_domain.
make apply ENV=nombre_de_cliente
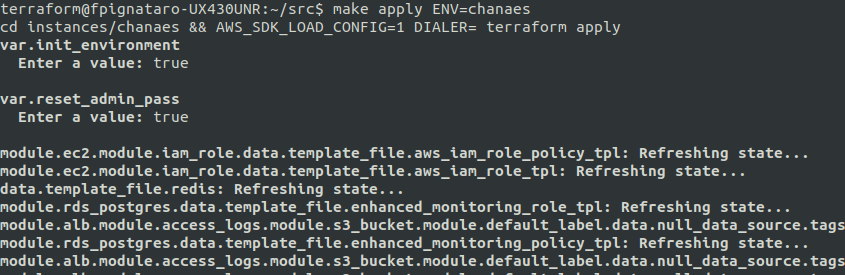
As we can see, the make apply tells us to enter two parameters (init_environment and reset_admin_pass):
var.init_environment
Enter a value:

var.reset_admin_pass
Enter a value:
both variables are explained here: ref:about_install_omlapp_variables

Once the creation of the resources is finished, the deployment proceeds with the software components implied by OMniLeads.

Finally, our URL client will be available to start operating.
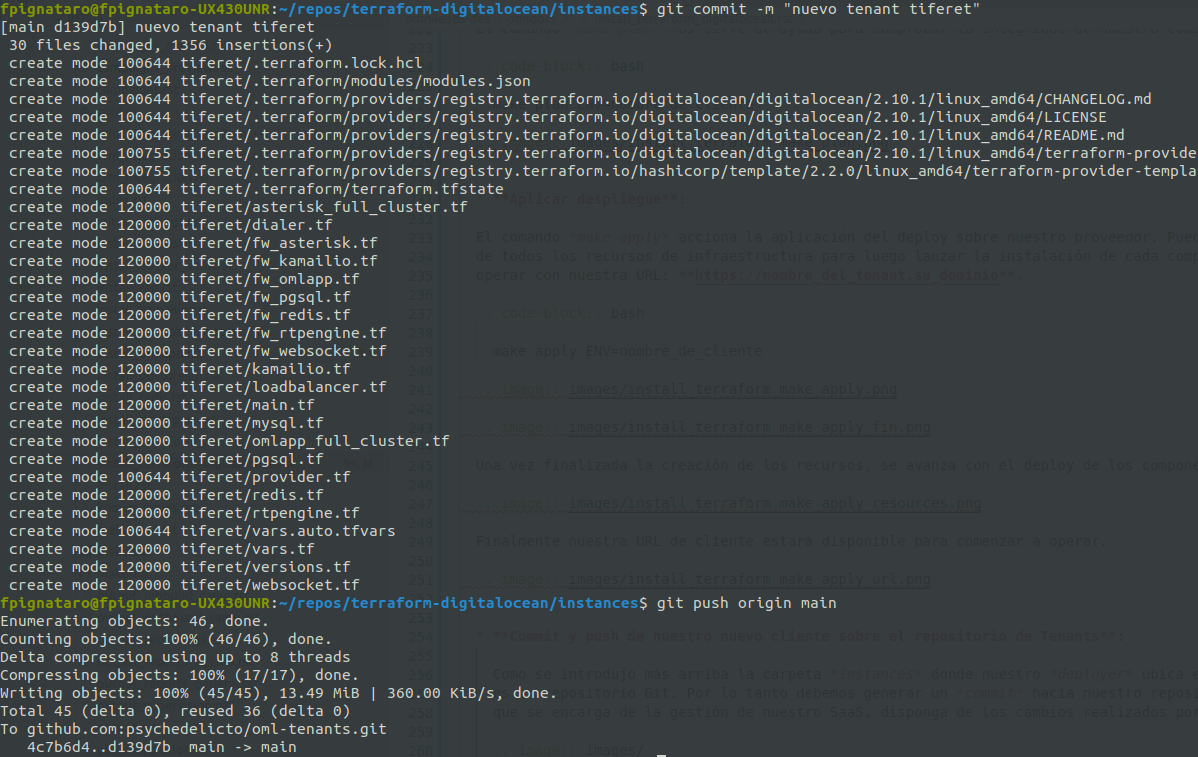
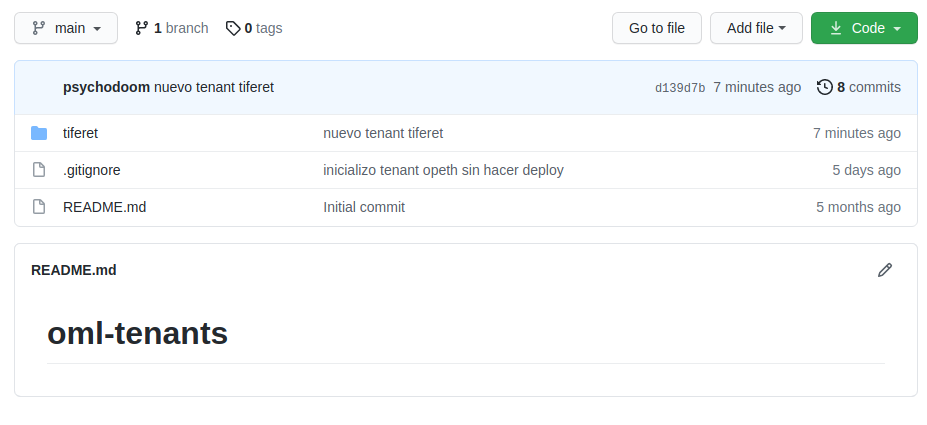
Commit and push of our new client on the repository of Tenants:
As explained above, the folder instances * where our *deployer locates the code and configuration pertinent to each client of our SaaS is a Git repository. Therefore, we must generate a commit to our repository of tenants so that the DevOps team that manages our SaaS, can count on with the changes made by any member of the team.
Note
Of course our tenants code container repository should be private!
Tenants Management: Updates
Una de las ventajas que posee trbajar en la nube es el hecho de utilizar la tecnología S3 - object storage para almacenar grandes volumenes de datos. En el caso que nos compete serían grabaciones de llamadas, asi como tambien audios o musica en espera subida a traves de los modulos de omnileads, por lo que cada instancia EC2 simplemente se aprovisiona con variables de entorno y comienza a funcionar, ya que las bases de datos y archivos importantes se encuentran persistidos y alcanzables a nivel TCP/IP.
Esto nos permite abrazar el concepto de infraestructura inmutable, el proceso de actualización se considera como un despliegue de una nueva versión de la App, por lo tanto el proceso implica que las instancias EC2 candidatas a ser actualizadas en realidad serán destruidas y en su lugar se lanzarán nuevas instancias a las cuales se les aprovisionará la versión del componente indicada como actualización en el archivo de variables de cada tenant.
Pasamos entonces a modificar la versión de cada componente (OMLApp, Asterisk, Kamailio ó Redis) que se desea actualizar: Todo esto dentro del archivo tenant.auto.tfvars:
# Braches release to deploy
oml_app_branch          = "release-1.25.0"
oml_redis_branch        = "210714.01"
oml_kamailio_branch     = "210714.01"
oml_acd_branch          = "210802.01"
oml_websockets_branch   = "210802.01"

reset_admin_pass        = "false"
Note
Recordar llevar a false los parámetros que blanquean la password de admin.
Once the file is adjusted, proceed with a make plan and if no issues then proceed with a make apply. This last one will take care of destroying Linux instances that have versions divergent from what is provided in the variables file, for later recreate these instances and provision the installation of each component about the desired version.
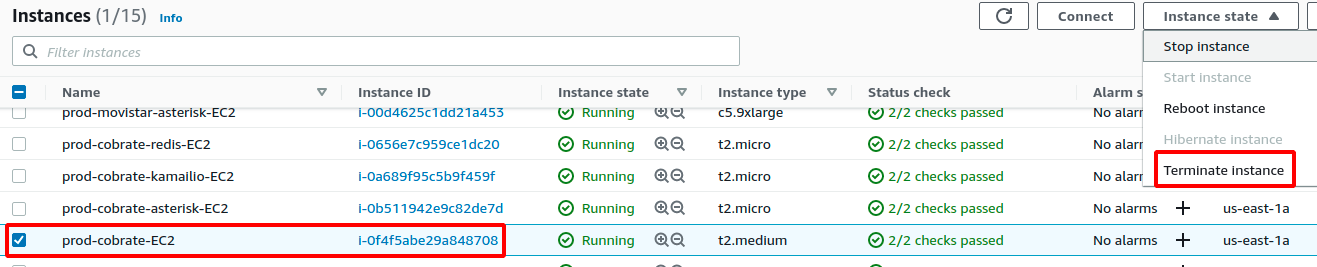
Important
Instances of wombat dialer and OMLApp are based on auto-scalling group, so for the update to finish successfully we need to execute a terminate manually from the web interface of AWS administration.
Tenants Management: Re-sizing
When resizing a tenant, we simply have to adjust the variable file:
## SIZING VARS ## SIZING VARS ## SIZING VARS
# OMLapp component ec2 size
ec2_oml_size            = "t2.medium"
customer_root_disk_type = "standard"
customer_root_disk_size = 20
ebs_volume_size         = 10
# Asterisk component ec2 size
ec2_asterisk_size       = "t2.micro"
asterisk_root_disk_size = 50
# REDIS component ec2 size
ec2_redis_size          = "t2.micro"
# Kamailio component ec2 size
ec2_kamailio_size       = "t2.micro"
kamailio_root_disk_size = 25
# Websockets component ec2 size
ec2_websockets_size       = "t2.micro"
websockets_root_disk_size = 25
# RDS PGSQL cluster size
pg_rds_size             = "db.t3.micro"
We select the instance size for each component, we save changes and just as always we should launch a make plan. If no issues presented, continue with the make apply to impact the resource changes.
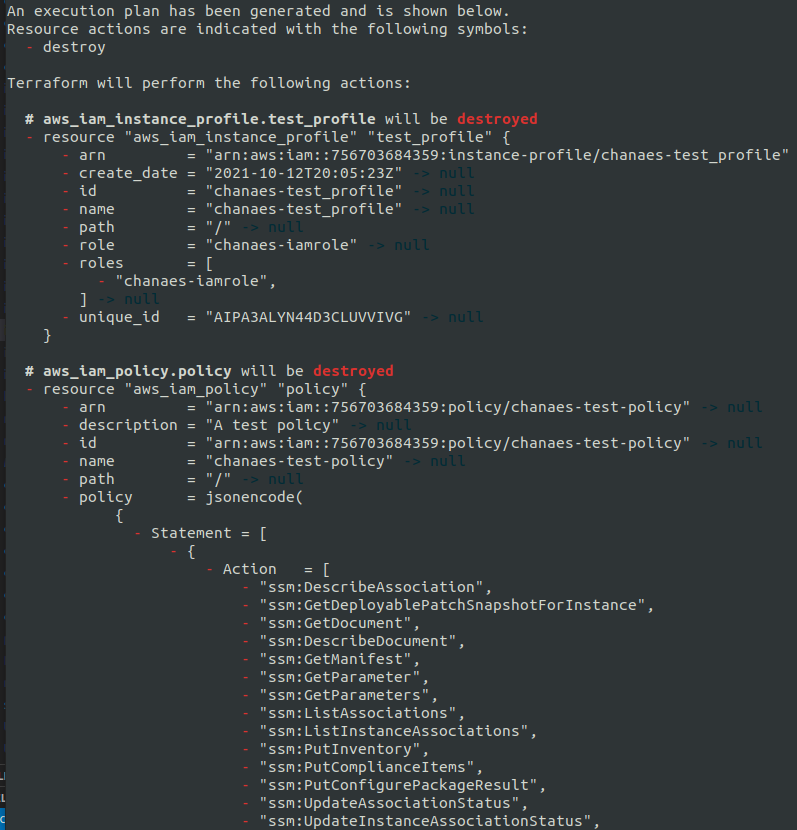
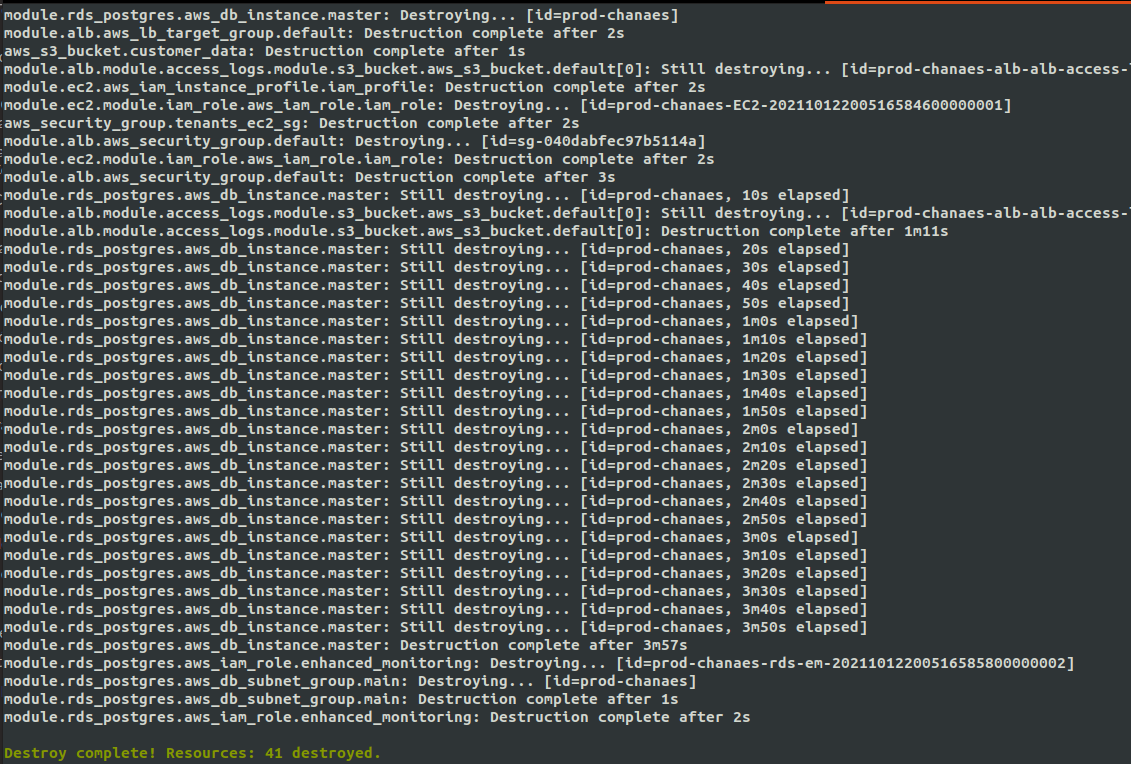
Tenants Management: Destroy
With the command make destroy we proceed with the destruction of our Tenant. All infrastructure resources will be destroyed. However, it is necessary to leave the recordings and logs bucket empty since destroy procedure will fail if buckets contain information data. This behavior responds to the fact of preventing loss of valuable data.
make destroy ENV=nombre_de_cliente