Login
Access the system using OMniLeads URL from a browser.
If there are no commercial certificates installed, a security exception takes place when trying to access for the first time. This is because the presence of a self-signed certificate under https protocol.
In this case, just accept the exception and continue, as shown in figure 1 and 2.

Figure 1: certificate is not trusted

Figure 2: certificate is not trusted
After accepting security exception, agent is able to access using username and password.

Figure 3: login screen
After successfull login, agent screen is shown. The first thing that comes up is a browser pop-up screen telling us that OML needs access to microphone. As expected, this action needs to be allowed in order for the agent to use those resources for operating.
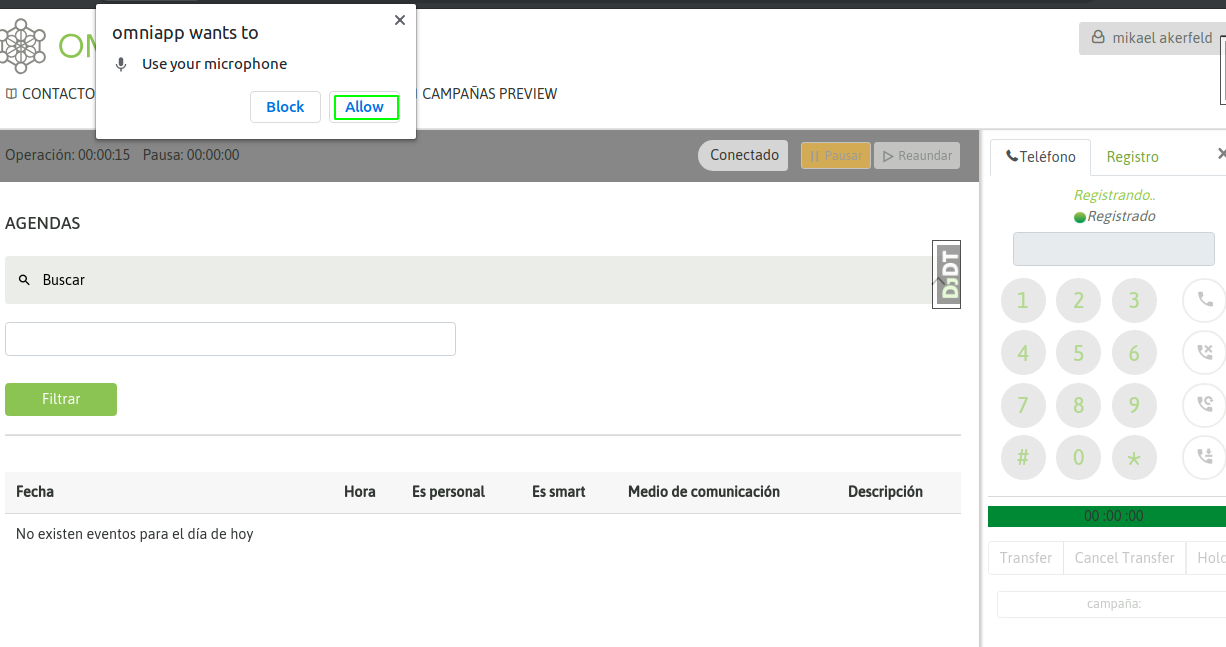
Figure 4: OMniLeads wants to use your microphone
Once this is accepted, agent is able to login successfully and can listen a brief login message over the headsets.
Agent will see the Webphone, and if all is going on a Registered status will be displayed as it is shown in figure 5.

Figure 5: Succesful agent login
Agent Console
Agent console is the component where all call management flows. In the following picture, we can see the different sections that will be explained below.

Figure 6: the OMniLeads agent console
(1) Contact Management
In this section we see the way the agent can navigate among different campaign contacts, scheduled callbacks, dispositioned calls, and also access to Preview Campaigns in order to retrieve contacts to dial.
All the above will be explained in depth in the next sections.
- Status Bar
In this bar, session information is shown.

Figure 7: status bar
In the status bar there are two chronometers with the amount of agent time in Pause and Ready status. Its color changes according to whether the agent is in the Ready (gray), On call (green) or Paused (yellow) status. A status legend can also be seen as a description. Finally the Pause and Un-pause buttons appear, so that the agent can go to pause and leave it.
- Dynamic Information Area
All the information that the agent is requesting while browsing can be seen in this section, as well as Contact Information when agent processes a new call.
(4) Webphone
OMniLeads Wephone is the main component within Telephony module. Let’s review the embedded buttons.

Figure 8: Webphone
Webphone can be separated in 5 pieces:
- Webphone Status. It should be seen always as Registered. If that is not the case, please cotact the System Administrator.
- Dialpad: used for dialing numbers manually or pressing DTMF options in a connected call.
- These buttons allow the agent to shoot certain actions: dial, hangup, re-call, and the possibility to “leave a mark” in a conversation, i.e. a specific comment.
- These buttons allow to the agent to make actions like: make a transfer call, make a conference with a third party and hold the call
- This button allows to modify the campaign which is processed each manual call. More information in “manual campaign” section
- This button allows to make a call to another agent, also to make an outbound call to an external number withouth association to a campaign
Almost all of the functionalities are analyzed in depth in the related sections.
Dock
In the current version, OMniLeads just supports Webphone component to make/receive calls. In future versions Product Team will be activating other modules.
Pauses
Agent has the ability to enter in Pause mode so that no incoming or predictive campaign calls are delivered. As explained in the “Initial configuration” section, there are different types of pauses the Administrator can create and maintain in the system. Therefore, when entering the pause status, the agent must select the type of pause.
For entering in Pause mode, Agent must click in the “Pause” button in the status bar of the console.

Figure 8: Pause
Pause type selection process takes place.

Figure 9: Pause class
Finally, the agent is paused. It should be noted how the status bar changes to “yellow” color, also the current pause type can be read in the status bar and the Pause timer starts to run. On the other hand, Operation timer stops.

Figure 10: On Pause
Logout
In order to log out of the system, agent needs to click on the exit button as displayed below.

Figure 11: agent logout