Deployment Execution on Linux instances
Here we cover the installation based on running the script first_boot_installer manually, on each Linux host involved in the installation.
Como bien sabemos, a la hora de ejecutar una instalación, podemos optar por cómo vamos a distribuir los componentes, es decir, qué servicios vamos a agrupar sobre un mismo Linux host y cuáles van a correr sobre instancias exclusivas.
Es sabido que cada componente cuenta con su script de deploy first_boot_installer.tpl para instalar el componente sobre un Linux host. Sin embargo, se resalta el hecho de que el componente OMLApp cuenta con un first_boot_installer.tpl más complejo, ya que posee la posibilidad de determinar qué componentes (Asterisk, Kamailio, RTPEngine, PostgreSQL, Redis, Websockets) deberán desplegarse junto a la aplicacion web principal OMniLeads, compartiendo así el host, y cuáles otros no se despliegan por haber sido declarados en sus variables con sus respectivas direcciones de red (export component_host=).
La regla entonces, es definir la distribución de componentes y luego ejecutar, en el siguiente orden, el despliegue de cada uno de ellos:
- RTPEngine Deployment.
- Redis Deployment.
- PostgreSQL Deployment.
- Asterisk Deployment.
- Kamailio Deployment.
- Deploy del componente Websockets.
- Deploy de MinIO (opcional, si se desea guardar grabaciones, imágenes y otros datos en Object Storage S3 compatible).
- WombatDialer Deployment (optional, if you need to work with predictive campaigns).
Finally, we should launch the deployment execution of our main component OMLApp.
Note
Si la idea es generar un deploy AIO (All In One), es decir todos los componentes de OMniLeads compartiendo el mismo Linux host, entonces simplemente se debe ejecutar el first_boot_installer.sh del componente OMLApp, dejando seteado con el valor NULL a todas aquellas variables que hagan referencia a la dirección de red de un componente. Es decir:
export oml_redis_host=NULL
export oml_asterisk_host=NULL
export oml_kamailio_host=NULL
export oml_psql_host=NULL
export oml_rtpengine_host=NULL
export oml_websocket_host=NULL
Para obtener nuestro script, se debe lanzar el siguiente comando:
curl https://gitlab.com/omnileads/ominicontacto/-/raw/master/install/onpremise/deploy/ansible/first_boot_installer.tpl?inline=false > first_boot_installer.sh && chmod +x first_boot_installer.sh
Entonces, una vez que contamos con el script, pasamos a trabajar las variables, quitando comentarios y configurando sus valores dentro del propio script. Aquí, detallamos y explicamos cada una de las OMLApp Component Installation Variables.
A continuación, se plantea una parametrización de variables adecuada para un despliegue All In One:
# ******************** SET ENV VARS ******************** #
# ********** # The infrastructure environment:
# ********** # Values: onpremise | digitalocean | linode | vultr | aws
export oml_infras_stage=onpremise

# ********** # The GitLab branch
export oml_app_release=master

# ********** # OMniLeads tenant NAME
export oml_tenant_name=deploy-example

# ********** # Device for recordings
# ********** # Values: local | s3 | s3-minio | s3-aws | nfs
# local: if you want OMniLeads to consider storage data & recordings on local disk.
# nfs: if you want OMniLeads to consider storage data & recordings on /opt/callrec (NFS mount point)
# s3: if you want OMniLeads to consider storage data & recordings on generic S3 object storage.
# s3-aws: if you want OMniLeads to consider storage data & recordings on AWS S3 object storage.
# s3: if you want OMniLeads to consider storage data & recordings on minio S3 object storage.
# ***********
export oml_callrec_device=local

# ********** # Parameters for S3 when s3 is selected as store
# ********** # s3_access_key or NULL
export s3_access_key=NULL
# ********** # s3_access_secret_key | NULL
export s3_secret_key=NULL
# ********** # se bucket name | NULL
export s3_bucket_name=NULL
# ********** # s3 endpoint url Only when use non AWS S3 object | NULL
export s3_enpoint_url=NULL
# ********** # s3 bucket region | NULL
export s3_region=NULL

# ********** # Parameters for NFS when nfs is selected as store for oml_callrec_device
# ********** # NFS netaddr | NULL
export nfs_host=NULL

# ********** # Set your network interface
export oml_nic=eth0

# ********** # ******* Variables for ACD Asterisk *******
# ********** # AMI connection from OMLApp
export oml_ami_user=omnileadsami
export oml_ami_password=098098ZZZ
# ********** # Values: NULL | IP address or FQDN
export oml_acd_host=NULL

# ********** # ******* Variables for PGSQL *******
# ********** # POSTGRESQL network address and port
# ********** # Values: NULL | IP address or FQDN
export oml_pgsql_host=NULL
export oml_pgsql_port=5432
# ********** # POSTGRESQL user, password and DB parameters
export oml_pgsql_db=omnileads
export oml_pgsql_user=omnileads
export oml_pgsql_password=098098ZZZ
# ********** # If PGSQL runs on Digital Ocean PGSQL cluster, set this parameter to true
export oml_pgsql_cloud=NULL

# ********** ## ******* Variables for Dialer *******
export api_dialer_user=demoadmin
export api_dialer_password=demo
# ********** # Values: NULL | IP address or FQDN
export oml_dialer_host=NULL

# ********** # ******* Variables for WebRTC bridge *******
# ********** # Values: NULL | IP address or FQDN
export oml_rtpengine_host=NULL
# ********** # Values: NULL | IP address or FQDN
export oml_kamailio_host=NULL

# ********** # ******* Variables for Redis and Websocket *******
# ********** # Values: NULL | IP address or FQDN
export oml_redis_host=NULL

# ********** # Values: True or NULL
export oml_redis_ha=NULL
export oml_sentinel_host_01=NULL
export oml_sentinel_host_02=NULL
export oml_sentinel_host_03=NULL

# ********** # Values: NULL | IP address or FQDN
export oml_websocket_host=NULL
export oml_websocket_port=NULL

# *********************** NAT voip webrtc setting ***************************************************************************************
# External IP. This parameter will set the public IP for SIP and RTP traffic, on environments where calls go through a firewall.        #
# Values: auto | IP address | none                                                                                                      #
# auto = The public IP will be obtained from http://ipinfo.io/ip. It depends on the WAN connection that OML is using to go to Internet. #
# X.X.X.X = The public IP is set manually.                                                                                              #
# none = If the agents are working on a LAN environment, and don't need a public IP.                                                    #
# ***************************************************************************************************************************************
export oml_extern_ip=none

# ********** # ******* Vaiables for OMLApp web *******
export oml_tz=America/Argentina/Cordoba
# ********** # Session Cookie Age (SCA): It's the time in seconds that will last the https session when inactivity
# ********** # is detected in the session (by default is 1 hour)
export oml_app_sca=3600
# ********** # Ephemeral Credentials TTL (ECTTL): It's the time in seconds that will last the SIP credentials
# ********** # used to authenticate a SIP user in the telephony system (by default 8 hours)
export oml_app_ecctl=28800
# ********** # Login failure limit (LFM): It's the number of attempts a user has to enter an incorrect password in login
# ********** # Decrease it if paranoic reasons
export oml_app_login_fail_limit=10

# ********** # Values: true | false
export oml_app_reset_admin_pass=true

# ********** # Above 200 users enable this
# ********** # Values: true | NULL
export oml_high_load=NULL

# ********** # Google maps API
export oml_google_maps_api_key=NULL
export oml_google_maps_center='{ "lat": -31.416668, "lng": -64.183334 }'

###########################################################################
# ------------------------ SMTP relay settings -------------------------- #
# You can modify these parameters according to your own smtp relay server #
# On the contrary, we leave the google smtp relay configured.             #
###########################################################################

# **** Values: true or false
export oml_smtp_relay=false

# **** If smtp_relay is true, then you must to define
# **** some of these parameters:

#export oml_email_default_from=
#export oml_email_host=
#export oml_email_password=
#export oml_email_user=
#export oml_email_port=
#export oml_email_use_tls=
#export oml_email_use_ssl=
export oml_email_ssl_certfile=NULL
export oml_email_ssl_keyfile=NULL
# ******************** SET ENV VARS
Por último, ya podemos lanzar nuestro script first_boot_instaler.sh. Aquí tenemos diferentes opciones.
Empezando por la más básica, se podría ejecutar el bash script (otorgando permisos de ejecución), directamente sobre el Linux Host que se utilizará para correr OMnileads. Es decir:
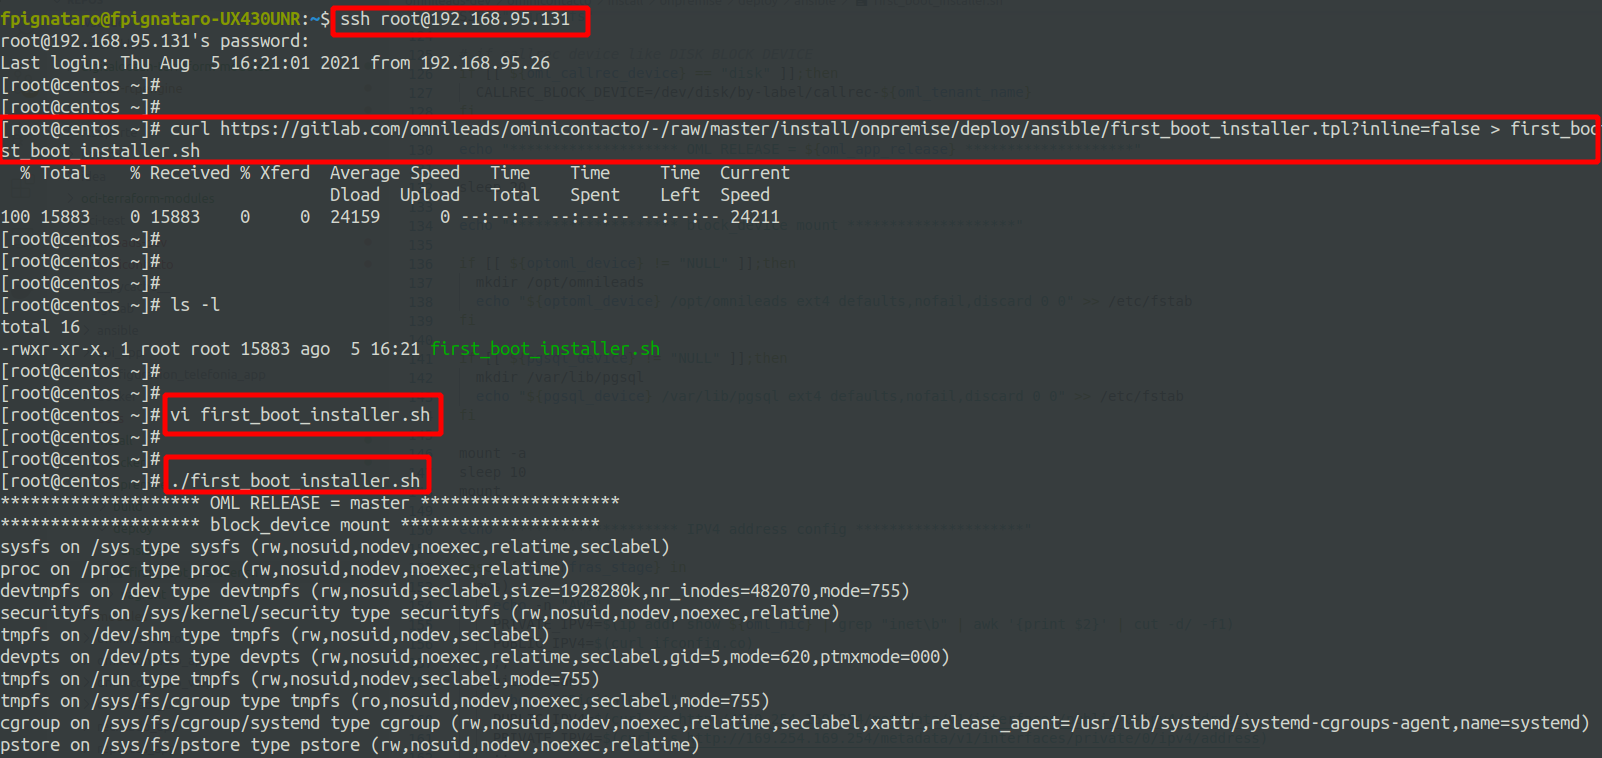
Deployment copying script to host
Pero también se puede invocar a nuestro bash script como “user_data” al momento de lanzar una instancia cloud. Ésto puede ser empleando alguna utilidad de línea de comandos para administrar la infraestructura (awscli, doctl, etc.), o bien directamente copiando el contenido de nuestro bash script en la sección destinada a aprovisionar un script de user-data. Por ejemplo:
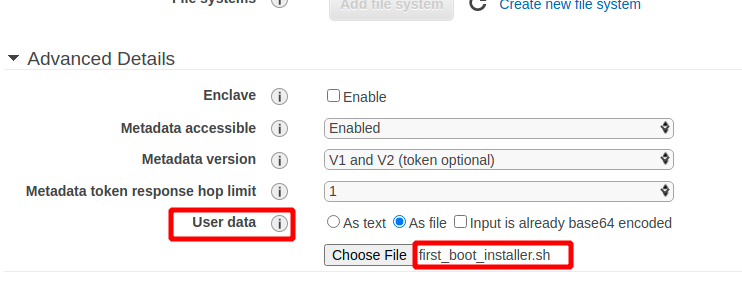
Deploy utilizando user-data en AWS
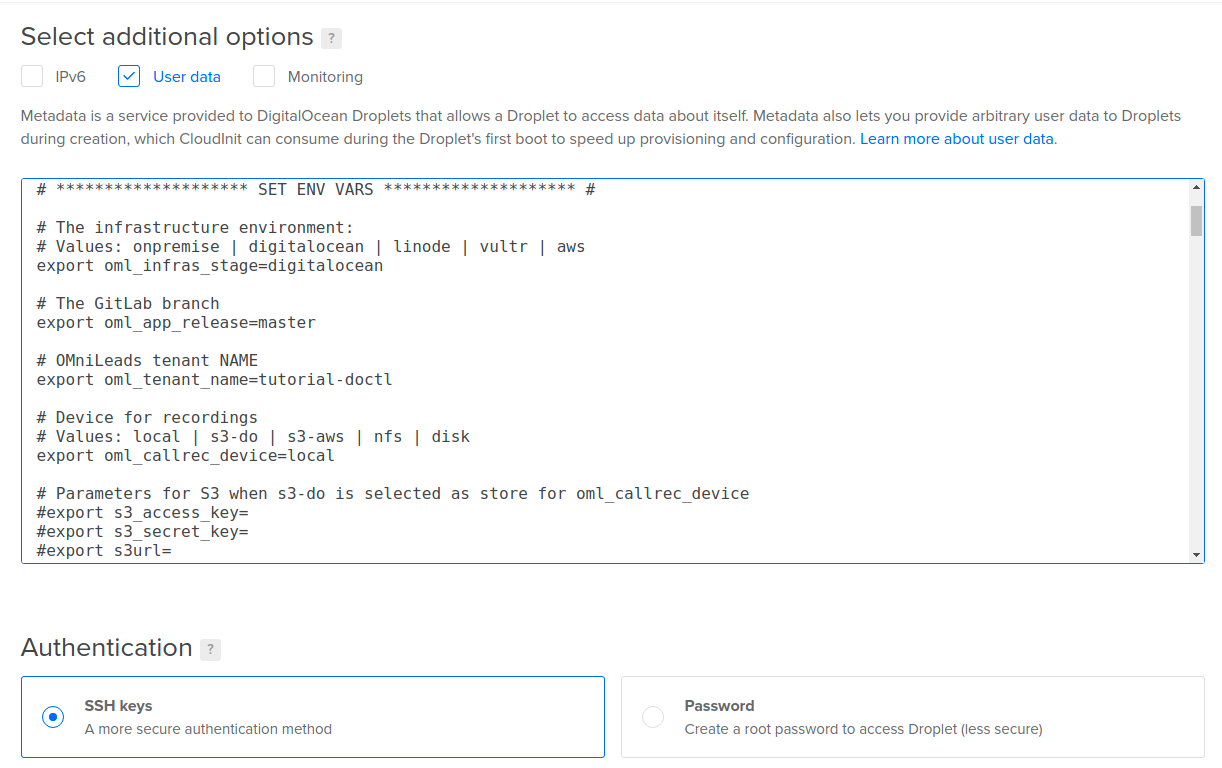
Deploy utilizando user-data en DigitalOcean
Installation completed
Al cabo de unos minutos, el proceso de instalación del componente OMLApp debe finalizar arrojando evidencia de la culminación exitosa del procedimiento. Ésta salida, la podrá encontrar en su pantalla si ejecutó el script de manera manual o bien en el archivo de log messages o cloud-init-out, en caso de lanzar la VM utilizando alguna otra alternativa como aws-cli, doctl o linode-cli, etc.:
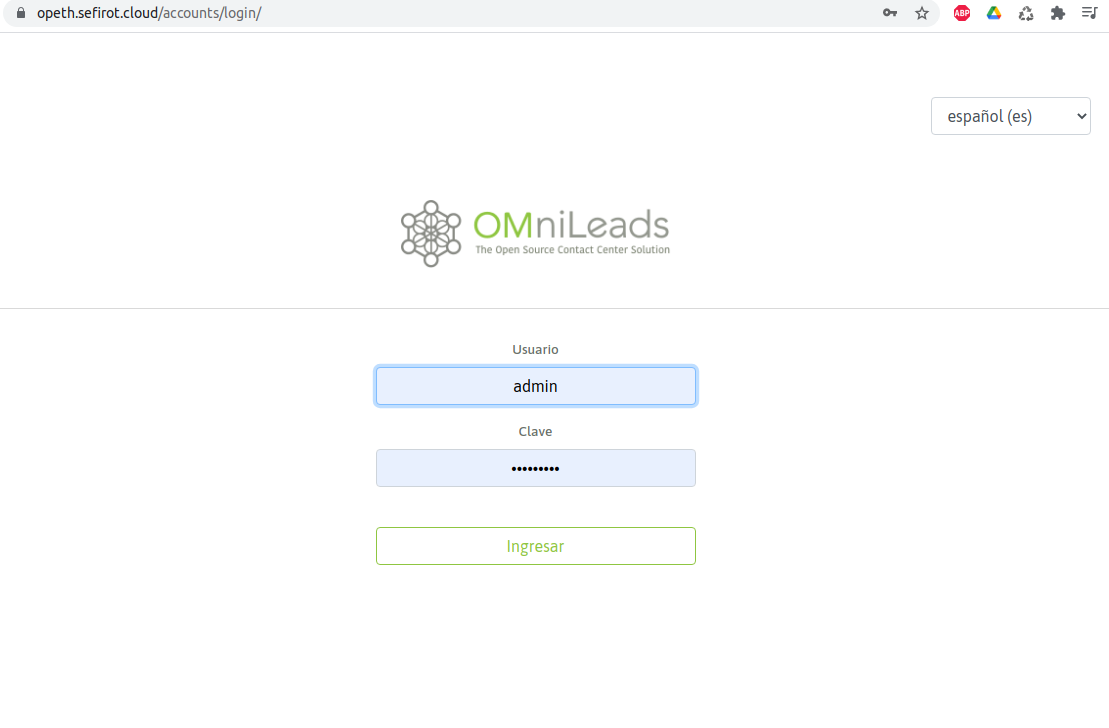
Therefore, we can now access the instance through its address Network (IP or FQDN).
OMniLeads is deployed with SSLv3 certificates for the HTTPS connection of the browser with the web server (Nginx), using a cert/key pair in Self-signed PEM format. It also uses SHA-512 with RSA encryption like signature algorithm and a key size of 4096 bits. Being self-signed, produces in the browser a warning of Site not secure at the moment of logging into the system. After adding the exception for trusting it, we can now access the login view.

Finally, you will be able to proceed with the initial setup.
Assigning your own SSL certificates
If you have your own certificates, it is possible to shoot deployment using them. To do this, you need to just run the deployment using the script first_boot_installer.sh on the host to install, and there in the same directory from which you are going to launch the script, you will need to create a folder named certs with your certificates in (cert and key files in .pem format). The script is prepared to verify if that directory exists, in order to take the files and assign them in the deployment process (cert.pem and key.pem).
During the deployment process, the files are detected in that location and therefore are provided at the web and WebRTC level, in such a way that the platform is available and using its own trusted certificates.